The Walkthrough for Diablo 4 provides a detailed guide on how to complete the Main Campaign covering the Main Quests. This guide will include information regarding helpful details about Bosses, Monsters, and NPC encounters. This page aims to guide all players through their gameplay and complete all the important Locations and other aspects of the game while completing the main story and highlighting boss fights and important item drops.
Diablo 4 Campaign Guide
When you first finish the Prologue, 3 new acts will be immediately available to your character. This gives you the freedom to choose which Act you want to play first. In this guide, we put together a recommended walkthrough based on difficulty, accessibility, and efficiency.
Each of these acts has its own recommended level, but it is up to you if you want to follow, or completely ignore the recommendations. However, following this guide will allow you to have an easier time adjusting to the Diablo 4 Non-Linear Campaign in Sanctuary.
Diablo 4 Walkthrough Helpful Pages
- If you need help with the basics, refer to New Player Help, which includes a full beginner guide.
- If you need help with your equipment, see Weapons, Armor, or Accessories.
- If you need help with enemy strategy, see Bosses or Enemies.
- If you want online action, see Online and join Our Discord.
- See Lore to understand the story of the game.
Diablo 4 Acts & Main Quests
Diablo 4 has a total of 6 acts together with an Epilogue and Prologue. Each of these Acts has its corresponding Main Quests. In the beginning, the first 3 acts as mentioned earlier, don't follow an actual order. The first 3 acts will converge by Act 4, which is the shortest among the Acts.
Act 5 is the longest campaign in Diablo 4, which makes up for the duration of Act 4, and then finally, we have Act 6 which will take place in multiple places in the Sanctuary, leading to the Finale/Epilogue.
Diablo 4 Challenges
Challenges in Diablo 4 require players to complete a range of numeric-based tasks, such as defeating a specific number of monsters or accumulating a certain amount of gold. With each Challenge conquered, players can earn a coveted Title to showcase their accomplishments in the game. Read on to learn more about Diablo 4 Challenges and the rewards that await those who can rise to the occasion.
There is a total of 441 different Challenges divided into 10 categories, such as Exploration, Classes, Open World, etc.
Diablo 4 Game Difficulty / World Tier Guide
There is a total of 4 World Tiers available in Diablo 4:
- Adventurer
- Veteran
- Nightmare (Level 50+)
- Torment (Level 70+)
Diablo 4 Trophies & Achievements
Diablo 4 features Trophies & Achievements that will allow players to reach the Platinum level, or get 100% completion of the game. Head on to Trophy & Achievement page for more info.
Walkthrough for Diablo 4
Diablo 4 All Prologue Main Quests Quick Navigation
Dusk on the Mountain ♦ Darkness Within ♦ A Hero's Return ♦ A Hero's Reward ♦ Prayers For Salvation ♦ In Search Of Answers ♦ Rite Of Passage ♦ Missing Pieces
Dusk on the Mountain
Look for a nearby settlement
Your journey begins in Fractured Peaks, a cold and wintry area within Sanctuary. After spending the night alone in a cave, your next objective is to seek shelter from the storm. To locate your destination, use your map and look for the golden symbol and pin it for a guided path.
Following the path, you'll come across enemies mainly Wargs among other creatures. Your path will lead you to a nearly abandoned Nevesk. Then shortly, a voice will be heard coming from one of the huts. Locate the voice that was just heard and when you get close to the door, the condition 'Locate the Voices' for Dusk on the Mountain will be cleared.
Inside the hut, you will find Oswen, Vani, and a man who's rambling about demons emerging from the ruins. It appears that they have subdued this man and Vani assures you that she'll clarify everything. Next, Vani will take you to a nearby Tavern to explain further about the situation at hand.
She will tell you about their town, or what's left of it. Inside the tavern, a couple of other townsmen (NPCs) are resting. This is where you'll meet a Healer named Stanis and an Armor Vendor named Isbel. Vani will ask if you have the ability to protect them against dangers lurking beyond and will ask you to take care of something for them in the Icehowl Ruins. Upon finishing this quest, you'll earn a Skill Point that you can spend freely.
Darkness Within
Explore Icehowl Ruins
Make your way towards Icehowl Ruins [Diablo 4 Map Link], a Dungeon situated just north of the town as indicated on your map. Along the way, you'll come across different types of enemies such as bears and skeletons. Enter the ruins by interacting with the gate.
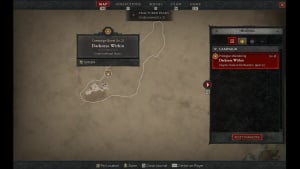
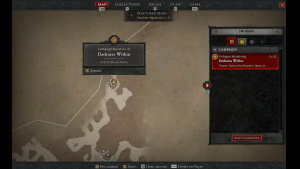
Icehowl Ruins is the very first Dungeon that you will explore in Diablo 4. To continue on your quest, make your way to the door at the rear and then through the subsequent door to your right. Continue to advance through these doors until you arrive at an area with two entrances. The one on your right is vacant, while the one straight ahead is teeming with Skeletons lying in wait to launch an attack.
Eliminate the Skeletons in the area before advancing to the next section. In this area, you will come across more Skeletons and Skeleton Archers, but the primary objective is a Treasure Chest located to your right. You can get another chest by going through the left doors and exploring a series of interconnected rooms. In the end, you will find a Healing Well and a Treasure Chest.
Continue through the hall to reach the Hell-Touched Corridors. Begin to explore the right side where you will encounter Hellstormers. After vanquishing them, move to the adjacent room that curves to the left. Here, you will face Fallen and a Fallen Shaman. Defeat them, then proceed to a larger room with additional Fallen and a Fiery Fallen. There is also an Armor Rack at the rear that is worth investigating. Overcome the enemies in the northern room and unlock the Treasure Chest.
Now, enter the door on the right to progress to another room with more Fallen and a Fallen Shaman. Follow the passage at the end of this room to reach another Healing Well, and then continue on the path beyond it. This will lead you to a room where a Decapitated Priest is lying on the ground. Interact with him to trigger the boss fight with X’Fal, The Scarred Baron. Defeating the Boss will yield a Simple Crossbow, Short Sword, Hide Pants, three Potion Charges, 300 Gold, and 1,505 XP. You can then use the rope at the back to return to Icehowl Taiga.
A Hero's Return
Return to Nevesk
After defeating X'Fal, the Scarred Baron, make your way back to the town of Nevesk to share the news of your victory over the dark forces. Head back to the Tavern and speak with Vani, who will express her gratitude for your help in protecting the town.
They will offer to share a stew and drinks with you, which will surely be a welcome treat after your long journey. Take a moment to rest and replenish your energy before venturing out into the world again.
A Hero's Reward
Survive the crazed villagers
Upon waking up, the people of Nevesk show their true colors and will start to attack you. You will be required to eliminate all the enemies in your way and clear the path in town. Once all the enemies are defeated, speak with Iosef. You will also search Vani’s corpse to obtain the Chapel Key, an important item to continue your journey.
Prayers for Salvation
Unlock the Chapel Door
After talking to Iosef, you'll discover that he was the same man from earlier who was murmuring about demons in the ruins. He will explain that the villagers drugged him just like they did to you, and to find more answers, you must go to the Chapel. With the key in hand, make your way to the Chapel, which is located just south of your current location on the map.
Upon arriving, enter through the doors and look for Blood Petals on the floor of the Chapel, which you can interact with. Doing so will trigger a cutscene of a priest ringing the Chapel's bell in the past when the town was livelier. However, the priest's conversation with the villagers is interrupted when petals start raining down from the ceiling. Lilith will then make quite the entrance, revealing the truth about what happened to the villagers.
Once the cutscene ends, speak with Iosef again. You can ask him about his purpose in Nevesk, and he will explain that he was searching for the Town Priest - whose fate is now known. You can also ask him about how you ended up outside the Chapel, and he'll clarify that you passed out, and he brought you out and set the Chapel on fire.
Share the vision that you saw with Iosef, and he'll inform you that he must report to the Cathedral your discovery. He'll then instruct you to travel north to meet with a hermit who might have some connection to these events.
In Search of Answers
Find the Hermit's Cabin
Following your experience in Nevesk, you will continue your journey to search for the Hermit. Follow the path on the map in the top right-hand corner of the screen. As you exit the town's gate, you will find an Altar of Lilith that can be interacted with. This will increase your Obols carrying capacity by 5.
Along the way, you will encounter various enemies such as Skeletons, Wargs, Hatchlings, Spiders, and Spider Hosts. After passing a cave, you'll reach the searchable area for the Hermit's cabin. Continue to head north into the Eastern Pass. To the left, you will find the Windswept Cabin.
Interact with the cabin door to step inside. You will immediately notice the bookshelf that you can interact with, as well as Kettle by the fire, the Mortar and Pestle near the door, and the Jars on the wall. This all leads to a clue that someone was recently in the cabin. Interact with the bookshelf to reveal a secret room. Here, you can find Scattered Books on the floor with Specimen Notes (be sure to pick these up). You'll also notice a Rusted Trap on the floor, but most importantly, there is a Strange Skull at the back.
Interacting with the Strange Skull will trigger a cutscene with the Hermit, Lorath Nahr, returning home. He'll have a lot to tell you about what the villagers did to you and how Lilith's plans for everyone are much greater than we imagine. Together with the hermit, you will journey to Kyovashad.
Rite of Passage
Accompany Lorath to Kyovashad
Head north along the path to Kyovashad by using the map located in the top right corner. While on your journey, you will come across many Fallen, including a Fallen Shaman and a Fallen Overseer. When you arrive in the city, a Guard on the street will ask you to stop before entering. At this point, speak with Lorath first.
Lorath will explain that you must perform a cleansing ritual to gain entry to Kyovashad. Fortunately for him, he gets to skip it, so you will have to do it alone. First, you need to pick up the Holy Cedar Tablets from the shrine and inscribe it with the sin that troubles you the most. You can choose between Fear, Anger, Pride, Greed, or nothing at all. Then, throw it into the Brazier located right next to it. Once you are done with the ritual, return to the Guard and inform him that you have finished the ritual. You can now go meet up with Lorath again.
Missing Pieces
Find Lorath in Kyovashad
After locating Lorath, he will explain that he needs to venture to the Dry Steppes to locate the Pale Man from your vision. However, he tells you that he needs an item first before leaving. Go to the Merchant in the town and buy his item. Before proceeding, you can talk to him to know more about Nevesk, Inarius, and Lilith.
Proceed to the Merchant in the town and inform him that Lorath has sent you. He will request payment for the weapon, but it's only 20 Gold to acquire his Polearm, so obtain it. Additionally, he will provide you with a Strange Amulet to give to Lorath.
Present both items to Lorath, and he will clarify that the Amulet represents the Horadrim's mark, an ancient group of Scholars and Mages who vowed to safeguard Sanctuary from demons. While they are scarce nowadays, he will provide you with a lead on someone who may be useful on your expedition.
Diablo 4 All Act 1 Main Quests Quick Navigation
III Tidings ♦ Tarnished Luster ♦ The Knight and the Magpie ♦ Undertaking ♦ Below ♦ In Her Wake ♦ StormingTheGates ♦ The Cost Of Knowledge ♦ Light's Guidance ♦ Kor Valar ♦ Pilgrimage ♦ Light's Judgement ♦ Light's Protection ♦ Wayward ♦ Shroud of the Horadrim ♦ FledglingScholar ♦ CrossingOver ♦ Descent ♦ Light's Resolve
III Tidings
Speak with Reverend Mother Prava
Your next stop after meeting Lorath is the Cathedral of Light, which is located in the Northern region of Kyovashad. Lorath has his reasons to believe that the Cathedral could prove to be a useful ally to destroy Lilith and put an end to her evil plans. Your first objective after arriving at the Cathedral is to speak with Reverend Mother Prava, who is engaged in a conversation with Iosef. Reverend Mother Prava shares that she has received reliable news that a demon matching Lilith's description has been seen recently in Gale Valley, near Yelesna Waypoint [Diablo 4 Map Link].
Reverend Mother Prava will ask both you and Lorath to travel to a nearby town called Yelesna, to investigate the news. She will then hand you the Knight's Report to end the conversation. Similarly, you may also interact with her to get information about Lorath, encounters with Lilith, and the recent events in Yelesna.
Receiving the Knight's Report will mark the completion of this quest.
Tarnished Luster
Travel to Yelesna
For easier travel to Yelesna, use your map and drop a pin for a guided path. Your first stop upon arriving in the town is the Knights' Garrison which is located on the Northwest side of the village. Here, you will speak with Captain Ankers who is standing behind a war table. He informs you that there's a young girl who has been looking around and asking questions about Vigo. He will ask to continue the investigation and will point you to a mining camp atop Yelesna.
Tarnished Luster is marked completed when your conversation with Captain Ankers is done.
The Knight and the Magpie
Search the mining camp at Pine Hill
Captain Ankers informed you that Vigo was last seen in the mining camp at Pine Hill, which is your next destination located on the Northeast of the village.
Once you reach Pine Hill Mining Camp, you will continue following the path until you get to Windfall Hollow where you will speak to Vigo. In the middle of your conversation with Vigo, you will be interrupted by a young girl named Neyrelle. Having the same objectives of going down the mines, all 3 of you will decide to group up. Vigo will open the gates and then attempt to pull up the lift that can bring everyone to the bottom of the mines.
Unfortunately, the hoist gets stuck and you will have to look for another way to get there. The enemies will begin to attack you from this area and great caution is needed. Continue running east and around the cave until you locate a larger cavern opening. Defeat the enemy mobs that will attack you and afterward, head north at the split and approach the sealed gate to the Condemned Mines.
Entering the Condemned Mines will mark the completion of this quest.
Undertaking
Explore the Condemned Mines
In your quest to investigate the tracks left by Lilith, continue to follow the lead of Vigo and Neyrelle in the mines. More enemies will await you here ranging from a group of Skeletons, Skeleton Archers, and a Skeleton Captain.
As you progress, you will face more Skeleton-type enemies until you reach a circular room with a hole in the middle. Proceed down the path on the right, where you will fight a cluster of enemies consisting of Giant Bats, Ghouls, Skeletons, Skeleton Archers, a Skeleton Captain, and an Elite Skeleton.
Continue to go down the path on the right and you'll reach the Unstable Shafts where you'll find a locked door at the end of the path. Interact with it, and Neyrelle will offer to open it from the other side. While she's making her way there, you'll have to defeat waves of Vampire Bats and Ghouls. In the last wave, an Elite Fangstorm will join the mob. By the time you have defeated all of the enemies, Neyrelle will successfully open the door.
Head through the now-unlocked door and follow the linear path to the Collapsing Depths. Head upwards to continue forward where you will fight more Skeletons and Skeleton Archers on the way. When you reach another circular room, take the path on the right again, then at the end of the path will be the exit to the mines.
Escape through the opening to complete Undertaking.
Below
Repair the Ore Hoist
Together with Vigo and Neyrelle, you were able to escape the collapsing mines. Vigo will tell you that he is worried that the mines might collapse and they all might get trapped inside. Then, all of a sudden, Neyrelle will run off, supposedly having spotted Lilith. Worried about her safety, you will run after Neyrelle and speak to her to discover that what she saw wasn't Lilith the Demon, but only a statue of her.
She will express an urgent need to find her mother, as her life might be in danger. Now that this has been settled, you'll go towards the lift you need to get out at the end of the path. You discover that a Slain Demon is blocking the hoist's mechanisms from working properly when Vigo tried to use it earlier. Remove the body of the demon and this will mark the quest as completed.
In Her Wake
Explore the depths of Kasama
After locating the Ore Hoist that can take you back up to the surface, Vigo tells you that you must call for reinforcements. The conversation is quickly put aside after your party hears a grunting nearby, from the gate that was passed by earlier. To open the gate, interact with it, and inside, you'll find the last member of the escort struggling. You look around and the rest of the escort is dead already.
The man lying on the ground, Grendan, will inform you that Lilith has ambushed the escort and taken the woman named Vhenard deeper into Kasama. Grendan's last wish is addressed to Vigo to inform Reverend Mother Prava of the events that happened below and he will take his final breath. Neyrelle on the other hand, insists that they should save Vhenard, but Vigo is losing faith that they can still save her. Vigo will remain with the escorts' bodies and will leave Neyrelle to you.
Together with Neyrelle, you will continue your search for Lilith and cross the gap between the bridges. Follow the path until you find a track of Lilith on the ground then interact with Lilith's Blood Petals at the very bottom to see a vision of Lilith and Vhenard having a conversation. Vhenard accepts Lilith's offer of knowledge, though, in exchange for what is unknown. After the vision ends, continue to the opposite side to gain access to the Ancient Gate. More enemies are waiting on the other side such as Vile Lunatics, Vile Ones, and Vile Shamans.
Continue down the stairs where you will fight more enemies. Hoards of Vile Lunatics, Vile Ones, Vile Shamans, and a Vile Overseer will be awaiting your arrival. You have two choices, either you run past them or defeat them, and then when it's safe, you can climb down the wall on your South. Continue following the path until you find the Gate of the Cradle.
Open the gate by interacting with it and after doing so, this quest will be marked as completed.
Storming the Gates
Pursue Lilith and Vhenard
After discovering that Neyrelle's mother, Vhenard, made a deal with Lilith, you will now find yourselves in the Courts of Dawn in Cradle [Diablo 4 Map Link]. With Lilith's whereabouts still unknown, you continue to head up the steps in front of you. At the top, another pile of Lilith's Blood Petals is left behind which will show a vision of Lilith revealing to Vhenard that she wishes to find her son, Rathma.
Your next objective is to interact with the Ancient Gate after the vision ends, and awaiting you on the other side are clusters of Vile Ones and Vile Shamans. After defeating the enemies, take the path on your left, then a right. Continue exploring this area until you reach the main chamber. More traces of Lilith are left behind and Lilith's Blood Petals can be seen on the ground. A Demon named Rohaska shows up in an attempt to thwart the search for Lilith. Defeat her, then interacting with the blood petals will now be allowed.
The vision will show Vhenard choosing to stay with Lilith, rather than to return to Neyrelle. Lilith will be seen that she's teaching Vhenard a ritual that will help them to find Rathma beneath the ruins. After the vision ends, the barrier that was blocking the door will come undone. This door will give you access to the Cloisters of Dusk.
More enemies are waiting in this area — Bilefiends, Branders, Oppresors, Sandstalkers, Succubi, Vile Ones, Vile Overseers, and Vile Shamans. Explore this area until you reach a room with the Ancient Totem. In this area, you will fight an Elite Succubus guarding a narrow walkway.
Once the Elite Succubus guarding has been defeated, you can now interact with the Ancient Gate to open it. Afterward, speak to Neyrelle at the other end of the room, who will offer to dispel the barrier blocking your path. While doing so, multiple monsters will come forward to attack such as Bilefiends, Branders, and Sandstalkers. After successfully defending Neyrelle, she will be able to dispel the barrier, killing all remaining enemies.
Enter the Mourning Shore to complete the quest.
The Cost of Knowledge
Fight Vhenard
- Boss Fight: Vhenard
In your journey so far, you have discovered that Vhenard is working with Lilith to find and free her son Rathma. To continue, go down the steps in the Mourning Shore and turn left. Vhenard can be heard from the distance praising Lilith. Neyrelle will plead to her mother, but Vhenard insists on finishing the runes Lilith has convinced her will lead to a trove of knowledge. Vhenard believes the false promise of a demon and started thinking that Neyrelle wants it all for herself. Vhenard becomes hostile against both of you and will initiate a boss fight.
Vhenard is invulnerable for the duration of the boss fight, but instead, she can summon two Hell Spawns who must be defeated in this first phase. While you deal with them, you will also have to avoid some spells cast by Vehnard. After you successfully defeat them, Vhenard loses about a third of her health.
During the next phase, she spawns three Hell Spawns and a few Hell Stormers. Only the Hell Spawns have to be defeated, but if you're feeling overwhelmed, take some time to take care of the smaller demons too. Similar to the first phase, defeat all three Hell Spawns, and Vhenard will lose another third of her health. In the final phase, she spawns four Hell Spawns, a Pit Lord, and several Hell Stormers. Defeating all enemies will cause Vehnard to lose her remaining health, ending the boss fight.
Speak to Neyrelle after defeating Vhenard. Although she's a little bit bitter about you killing her mother, she understands that it was for her protection and asks you to obtain some blessed blood from Reverend Mother Prava. This will mark the quest as completed.
Light's Guidance
Return to Cathedral of Light
After the battle with Vhenard, Neyrelle will ask you to obtain some blessed blood to complete the ritual her mother started. You will need to return to the Cathedral of Light in Kyovashad. Reverend Mother Prava is currently away, instead, you will speak with Iosef to find her whereabouts. He informs you that she has left for Kor Valar and this short conversation will mark the quest as completed.
Kor Valar
Journey to Kor Valar
After your conversation with Iosef in the Cathedral of Light, you will now travel to Kor Valar, located in the Southeast of Kyovashad. Travel in that direction and then speak with guards stationed at the gate. You will meet Vigo on the steps where he is performing a tradition to honor the fallen soldiers. When he's done, you will go together to find Reverend Mother Prava.
Reverend Mother Prava is waiting behind a war table and here you will ask her for the Blessed Blood which Neyrelle needs to perform the ritual. Reverend Mother Prava objects to this and says that she will only allow it after undergoing Pilgrimage to the Alabaster Monastery.
Vigo will inform you that he will wait by the ruins South of Kor Valar, to help you in your pilgrimage. Shortly, this will mark the completion of this quest.
Pilgrimage
Journey to sacred altars
Speak to Vigo and he will tell you about how a Pilgrimage works. Where you will visit 4 different altars while carrying the Idol of the Faithful. After your conversation with Vigo, head Southwest towards the Altar of Purity, which is your first stop. Then, the next one is the Altar of Martyrdom, then the Altar of Anointed, then finally, the Altar of Redemption. In each of these stops, you will place the idol on the altar, read from the tablet, then, continue your journey.
Carrying this relic with you reduces your vision, a similar effect to if you were blinded, and makes you slightly slower. After your journey, your final stop is the Shrine of the Penitent, where monsters will try and stop you. Make sure to get rid of enemies before getting to the top where you'll find Vigo praying. He is praying for your audience with Inarius, and that may you be blessed.
This marks the quest as completed.Light's Judgement
Seek an audience with Inarius
After your Pilgrimage, you will now travel to Alabaster Monastery [Diablo 4 Map Link] to request an audience with Inarius, and grant you the blessing. Climb up the stairs to reach the portal at the top. When you get there a cutscene will play showing Inarius criticizing the weakness of humans. It appears that Inarius will simply cast you away without granting a blessing and this quest will be marked completed.
Light's Protection
Return to Reverend Mother Prava
After the audience with Inarius, you will now return to Reverend Mother Prava in Kor Valar. A sermon is being led by her to the Knights and the people of Kor Valar. When the sermon is done, you will go upstairs to speak with her once more. She will ask to go inside, away from the cold. Now, you will inform her that you didn't receive the blessing from Inarius however, Reverend Mother Prava will confidently say that she knows his ways, as you are still alive standing before her.
After this conversation, this will mark the quest as completed.
Wayward
Search for Neyrelle in the Mistral Woods
After receiving the blessing from Reverend Mother Prava, you will now meet up with Neyrelle by going to the Mistral Woods. The first objective is to search for Neyrelle in a zone, go towards the forest edges to check everything and you will find that she has begun her journey in Horadric Vault.
The location is a bit tricky but look out for a tree with glowing spots which will serve as a clue that you are closer to your destination. Once you see it, the hidden path to the Darkened Holt will be revealed to you and this will mark the Wayward quest as completed.
Shroud of the Horadrim
Search for Neyrelle continues: Enter the Darkened Holt
After discovering the entrance into the Darkened Holt [Diablo 4 Map Link], your objective now is to locate Neyrelle, then make your way to the Winding Way. A snowy path is laid before you, where many enemies await, Wood Wraiths and Phantoms alike. The Darkened Holt is similar to a mate with many turns and dead ends, however, you can check the edges to find Treasure Chests to open. Keep following the path until you reach an area where you can descend.
At the bottom, you will find a glowing portal where a Wolf is waiting for you. The Wolf speaks and asks you to take a leap of faith and jump into the portal. The Wolf will serve as your guide where you will be walking in the 'Vision of Tristram', he claims a safe sanctuary and that no harm will ever befall. Continue following the Wold and then, you will find out that the Wolf was the same one who kept you warm the night you started your journey.
The Wolf will take you further into the Living Gate and will lead you to another portal. Once more, the Wolf speaks and will warn of a future where Horadrim will make a mistake, and offers to spare you a way out before being caught in the aftermath. Interact with the portal that the Wolf showed you and this will safely take you back to Darkened Holt.
Now, continue on your path to find Neyrelle who has been searching the Horadric Vault on her own. She will ask for your assistance and make her way to the Shadowed Glade, where multiple clusters of enemies await including Phantoms, Hellcaller Wraith, and a Mirroring Wraith. After defeating your enemies, you will now look for the Three-Faced Statue and interact with it.
This will mark the quest as completed.
Fledgling Scholar
Explore the Horadric Vault and fight Tchort
- Boss Fight: Tchort, Herald of Lilith
With Neyrelle accompanying you, your next objective is the Mistral Woods. Now that your path to Darkened Holt has cleared, you will soon find yourself at the entrance of the Vault. To gain entry, interact with the Vault. Neyrelle expresses her concern and worries about the situation. Next, she will obtain a spell to help you cross the Black Lake. Together with Neyrelle, both of you will go deeper into the Vault.
Next, you will find a chamber with a book 'Lesser Verres and Incantations', the book which contains the spell that Neyrelle was looking for. Retrieve the book and return it to Neyrelle who will use it to gain access to the gate. Accompany Neyrelle to continue deeper into the Vault. Eventually, a door that is blocked with another spell will slow down your investigations. Neyrelle proceeds to unlock this barrier but informs you that she can't go any forward and you will have to go on your own.
Inside the study, Demons will attack you and prevent you from going after Lilith. Continuing deeper into the vault, you will find a Healing Well before an entrance. Make sure to heal up before proceeding. The book that you are looking for must be beyond the entrance and a strong demon guards it. Herald of Lilith will try and stop you from going further. You can view Tchort, Herald of Lilith Boss Guide for further information on this fight if needed.
After the fight, you will be able to retrieve Death Harnessed: Theories of Rathma from the boss chamber. Next, leave the room and return to the foyer where Neyrelle is waiting for you. This is the book that Neyrelle has been looking for that will help both of you cross the Black Lake, and also, she believes that it may hold the key to resurrecting her mother. Shortly, this will mark the quest as completed.
Crossing Over
Cross the Black Lake
With the book with you, your next destination with Neyrelle is to make it to Mistral Woods and look for the Mining Camp over at Pine Hill. This is the same camp that you explored earlier together with Vigo and Neyrelle. With the Ore Hoist fixed now, you can use it to descend and make your way to the bottom floor. Conversation between you and Neyrelle will take place, to discuss plans and expectations.
In the platform where you previously fought Vhenard, Neyrelle will now perform the ritual that will allow you to cross the black lake. This will reveal a bridge that will allow you to cross and continue your pursuit of Lilith. Before you cross, speak with Neyrelle first who wishes to stay behind and take care of Vhenard. From here on, you will be alone in your pursuit of Lilith.
Descent
Fight Lilith's Lament
- Boss Fight: Lilith's Lament
- Rewards: Vigo's Protecting Amulet
With the help of Neyrelle, you can now cross the bridge and go to the Necropolis of the Firstborn [Diablo 4 Map Link]. On the other side of the bridge, keep following the path ahead, until you will soon see a vision of Rathma. More visions of Rathma will appear, wherein he will talk about prophecies before vanishing again. Stay on the path until you reach a set of steps that will lead you to the Central Chamber. The gates are currently blocked and you will have to find a way to open them up. There will be 5 Tumors spread across the depths, destroying them will clear the way.
After taking care of all the tumors blocking, you can now safely enter the blocked path. Once inside, another vision of Rathma will be seen, and also more enemies will start attacking. Be ready for an attack at every turn, enemies will be everywhere.
Now, keep on following the path and make your way into the Central Chamber, in this area, a vision of Rathma and Inarius will be shown. It appears that Inarius has been demanding the key to be given to him, but Rathma refuses, and this makes Inarius angrier. Next, you will find a Healing Well before a gate, you're going to need to use this as a powerful enemy will be waiting.
Lilith's Lament will be your foe. He can cast powerful spells that can slow you down and poison you. He proves to be a very formidable enemy and a mysterious Knight will show up to help you in your fight. He can cast a barrier that will protect a small radius while Lilith's Lament can cast a powerful all-ground attack that can kill you instantly. There are 3 markers on this boss, and each time you can damage his health to that portion, he will drop 2 potions for you to use. Defeating this boss will drop high-value loot.
Once you defeat Lilith's Lament, you will now talk to the Knight who assisted you in the fight. It turns out that Vigo was the one fighting with you all along. Vigo will pass on his Protecting Amulet to you. This will mark the quest as completed.
Light's Resolve
Speak with Neyrelle
After your battle with Lilith's Lament, your next objective is to share your discoveries with Neyrelle. Look at your map to find her location, which will lead you to the Vault located in the Northwest of Yelesna. Start your journey there, or if you have unlocked the Waypoint, you can use that to reduce the travel time. Once you have talked to Neyrelle, this will mark your quest as completed and this will complete Act 1 and will also mark a milestone in your log.
Diablo 4 All Act 2 Main Quests Quick Navigation
An Unforeseen Visit ♦ Dark Omens ♦ Encroaching Shadows ♦ Exhuming the Forgotten ♦ Harrowed Lament ♦ Apex of Misery ♦ Parting Embers ♦ Feral Nature ♦ The Beast Within ♦ The Path of Rage ♦ Fangs of Corruption ♦ Stemming the Flow ♦ Buried Secrets ♦ In Ruins ♦ Entombed Legacy ♦ Shadow Over Cerrigar ♦ As the World Burns
An Unforeseen Visit
Look for Donan in Eldhaime Keep
After clearing Act 1, your minimum level should bring you at least to Level 20, allowing you to unlock a good amount of skills to help you in the upcoming battles. You will now travel to Eldhaime Keep to meet up with Donan. View the quest marker on your map, this is located in the Southern part of Scosglen. Once you make it to the gates, proceed to the western part of the area to speak with the Watch Commander. She is your contact point to find Donan's location.
Continue following the quest marker and inform the guard that you have an important message for Donan, you will be led up the stairs where Donan is having a conversation with his son, Yorin. The quest will be marked as completed after your conversation with Donan.
Dark Omens
Journey to Firebreak Manor
After your conversation with Donan, he will now ask you to visit him at his estate where he's more comfortable talking about the recent events that took place. You will receive a new quest marker that you can view on your map. Follow the path that will lead you to Firebreak Manor, which is located north of Eldhaime Keep.
Once you reach the fields of the manor, you will receive a new task to speak with Steward Wilfred, who is waiting for you by the Manor's Gate. He will then welcome you in and will ask you to proceed to the study where you can freely explore the area. When you're ready, enter Donan's Study [Diablo 4 Map Link].
You will find more tracks of Lilith here where you can interact with Lilith's Blood Petals. You will see a vision of what happened in Donan's Study. Where a door appears in front of Donan while he was writing. This will make Donan look into the door that has just mysteriously appeared before him, and Lilith is seen approaching him. Donan strongly denies her and casts her out. Lilith looks around and spots a painting behind Donan's chair, where 3 men can be seen in battle, and then she leaves immediately. Soon after the vision ends, noises can be heard coming from outside. It appears that Blood Clan enemies have shown up at the manor.
After successfully defeating all enemies, you can now speak to Donan on the fields who just fought with you. This will mark the quest as completed.
Encroaching Shadows
Travel to Braestaig
After confirming the events of Lilith's appearance with Donan, he will now send you to go look for the two Druids who helped him lock away Astraroth-- Nafain and Airidah. This will unlock 2 new quests: Encroaching Shadows and Feral Nature. The former sends you to Braestaig, a settlement near Airidah, and the latter, to Nafain.
To begin, follow your quest marker to the Wailing Hills in Scosglen. Braestaig is located next to the border between Wailing Hills and the Carrowcrest Ruins. Once you get close to the settlement, you will get a new quest prompt to speak with Chieftain Asgail, who's engaged in a conversation with Knight Omas, a Knight Penitent. They'll direct you to Airidah's Domain once asked about the demon's sightings. They inform you that the domain sits at the top of a hill, infested with evil spirits. Yorin, a young Druid offers to escort you there.
Begin your journey and follow the quest marker on your map to reach Weeping Cairns. Look for a ledge to climb that is on the edge of the radius marker on your map. This will lead you to the entrance to Airidah's Domain. Yorin will read the runes written on the entrance and while he's opening it, you'll be alone to defend both yourself and Yorin. By the time you have cleared all the enemy waves, Yorin will successfully uncover the entrance.
Entering Airidah's Domain will mark this quest as completed.
Exhuming the Forgotten
Enter the Weeping Cairns
Begin to look for signs of Airidah the Druid inside the chamber. You will find that the area has been infested with many monsters to slow you down. Continue exploring until you reach a Wardstone that is meant to block a passage. Yorin will examine this and will inform you that he needs a Ward Stone to gain access to the other side.
To move forward in this quest, interact with the door to your left and defeat all enemies there. Look around for an Overgrown Ward Altar and destroy it to grab the Wardstone from it. Bring this with you back to where Yorin is waiting. Hand it over to Yorin and he will read the inscription on the altar.
More enemies await you on the other side, and Crowd control skills are recommended in this area because of their hoard-like behavior. These monsters will continuously attack and try to slow you down. Defeat them to proceed to the Ancestor Heights. Another conversation with Yorin will reveal that the runes found on the Elder's Cairn are the work of Airidah, and he has reasons to believe that she is conspiring with the demons.
At the end of this path, you will find another chamber door, and going through this will lead you to the exit. This interaction will mark the quest as completed.
Harrowed Lament
Find Airidah
After exploring Weeping Cairns, you have discovered that Airidah the Druid is working with Lilith and the demons. Your next objective is to continue the search for Airidah, and outside the Weeping Cairns, an uphill path lies before you where you will hear a faint scream in the distance. Follow the source of this sound, where Vengeful Spirits await.
Enemies will continue to attack, and wave after wave of enemies will be coming at you. To progress, you will need to destroy Risen Remains while protecting yourself against hoards of enemies. After doing so, the fog will be cleared. Once you have defeated all the enemies, Arlo will come out of one of the houses, and you will learn that Airidah was last seen with Lilith, and the two of them are headed to Solitude. Shortly after this conversation, another thick fog will enclose the area and your objective now is to eliminate the Risen Remains, again.
Check the locations of the remaining Risen Remains from your map, follow it and you will be led to multiple waves of enemies. After destroying the final remains, return to Yorin and Arlo and speak with them. The end of this conversation marks this quest as completed.
Apex of Misery
Fight Airidah
- Boss Fight: Airidah, Keeper of the Dead
After your conversation with Arlo and Yorin, you will now make your way to Solitude where you will confront Airidah. You can see the quest marker on your map. Follow the guided path and as soon as you reach a Healing Well, this is the indication that you are near a boss fight. One thing to note is that there is a nearby Altar of Lilith in this location. See [Diablo 4 Map].
As you get closer to Solitude, you will hear a voice atop the cliff. Walk up to the top where you will speak to Airidah. She explains that she wants the Druids to remember what it took to defeat Astaroth and that this is a lesson to prepare her kind for the coming of hell. She also tells you that you are strong already, unlike her kin.
The boss fight against Airidah, Keeper of the Dead will start as soon as the conversation is over. Airidah can cast spells that will rain down on you and attack you from a distance. She can also vanish for a second and then move to a different location, just like teleporting. You can look at your mini-map to track her if she goes too far away from you. An indication is a puff of smoke will appear in her new location.
Each time a portion of Airidah's health is down, she becomes invulnerable and tethers herself to Wraiths that must be defeated first. During this period she will remain to cast her spells and the Wraiths are defenseless. This will give you a good opportunity to attack the Wraiths while dodging Airidah's attacks.
After the first phase, Airidah will return to her original form and she can now be attacked again. Beware that she gets a more powerful skill the more that you damage her. The same thing will happen 2 more times as you reach the final phase. She becomes invulnerable, and then you must defeat the summoned Wraiths while she continues to cast her spells. Keep damaging her until her health goes further to zero.
Airidah will reveal that she received the power from Lilith in exchange for information on how to break the wards where the demon Astaroth is imprisoned. Shortly after, Airidah takes her final breath and this will mark this quest as completed.
Parting Embers
Speak with Yorin in Braestaig
After your fight with Airidah, it has now become clear that Lilith's objective is to free the demon Astaroth. With the knowledge that she gained from Airidah, she now has the information to free him from his prison. Your next objective is to return to Braestaig where you will speak to Yorin, the young Druid who accompanied you into Weeping Cairns [Diablo 4 Map].
You'll inform the young Druid of Airidah's fate. He acknowledges that what Airidah did is unforgivable and he wishes to inform his father about the events. After this conversation, your quest will be marked as completed.
Feral Nature
Travel to Tirmair
After defeating Airidah, your next objective is to track the other Druid who helped Donan to defeat Astaroth. Travel to Tirmair and look for Nafain the Druid. Follow the guided path that will lead you to The Shrouded Moors in Scosglen. After speaking with the Knight-Captain Razia who is stationed there, she informs you that a demon matching Lilith's description was seen in the nearby moors and that corruption has started spreading there.
On your path to The Shrouded Moors, many enemies will await you and slow you down in tracking Lilith. When you get to the quest marker, interact with the Runic Message on the stone pillar. Shortly after, Nafain's Wolf will appear. At first, it is hostile toward you but you will speak to the Wolf and explain that you are looking for Nafain. The Wolf appears to understand your objective and after that, your quest will be marked as completed.
The Beast Within
Follow Nafain's Wolf through the woods
After your encounter with Nafain's Wolf, it will lead the way toward Nafain. Beware that there will be many enemies on your path, and make sure you will catch up with the wolf. Many enemy attacks can slow you down, so it's up to you if you want to outrun the enemies or defeat them instead.
This quest works similarly to an escort type, except Nafain's Wolf does not have a health bar and will not require it to be protected. At the end of your journey with the Wolf, you will find Nafain trapped in a tree, where the corruption is coming from. Nafain will recognize Donan's scent but he is aware that he is not nearby. He explains that Lilith trapped him and knows that he cannot be saved anymore. Instead, he insists that the Wolf named Fiorban will help you track Lilith down.
Fiorban will now begin to follow you in your next quest, and the end of this conversation will mark this quest as completed.
The Path of Rage
Follow the flow of corruption with Fiorban
At the end of The Beast Within, Nafain asks you to find Lilith with Fiorban to figure out what her plan is. Head back down the cliff to get back to The Blood Vale, then follow the paths north to get closer to your goal. You'll encounter some Lycan Terrors, Mangy Hounds, Plague Maggots, and Stinging Swarms that you can choose to defeat or simply run past.
Once you get to the entrance to the Untamed Thicket, you'll notice that the area has been blocked off by a barrier of blood. Three Unnatural Growths must be destroyed to take the barrier down. One of them will be right next to you, in front of the entrance to the Untamed Thicket. If you open the map, you'll find the other two denoted by a small diamond in the middle and south-side of The Blood Vale.
The Unnatural Growths themselves don't pose any danger, but the enemies surrounding them may. Head south towards both Unnatural Growths and defeat or run past the Mangy Hounds, Plague Maggots, Plague Maggot Young, and Stinging Swarms you encounter nearby. Destroy both Unnatural Growths then make your way back to the entrance to the Untamed Thicket.
With all three Unnatural Growths destroyed, the Profane Clot acting as a barrier to the Untamed Thicket can now be damaged. Destroy the clot and the quest will end.
Fangs of Corruption
Fight Amalgam
- Boss Fight: Amalgam of Rage Gestation
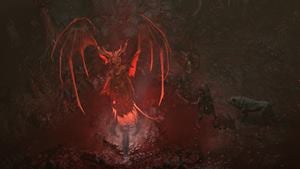
At the end of The Path of Rage, you cleared out the Profaned Clot blocking the entrance to the Untamed Thicket [Diablo 4 Map Link]. You can now enter the Untamed Thicket to progress the quest.
There aren't many regular mobs here, just a few Wargs and Wildwoods, so you can just run to the end of the linear path. On the way though, there are three Lilith's Marks that you can interact with to get short visions of what Lilith was doing here. When you get to the part where you have to duck under a tree, prepare yourself for a fight.
Past the tree and a few more steps ahead in the Corrupted Spawning Ground, you'll be put in a boss fight against the Amalgam of Rage Gestation. The Amalgam will be invulnerable and you'll see its health bar slowly tick up. Several Wargs, Werewolves, and Winter Hunters will appear that must be defeated. Try to defeat them as quickly as possible, as the boss will spawn shortly after its health starts ticking up.
At about a quarter of health, the Amalgam of Rage Gestation will emerge and become vulnerable. It has a move set similar to those of Wargs, mainly biting at close range and pouncing at you when far away. In addition, it can summon more minions — Wargs, Werewolves, and Winter Hunters — whenever it howls. This fight isn't too difficult, just be careful of being swarmed by the boss' minions.
After taking the Amalgam to about 1/8 health, you'll hear Lilith call for it and her other minions, and the fight will end with the Amalgam running away. It will leave some loot by the wall it jumped over. After your character ponders about where it might have gone, the quest will end.
Stemming the Flow
Return to Nafain
At the end of Fangs of Corruption, you discovered and fought the Amalgam of Rage Gestation before it was eventually summoned by Lilith and retreated. Backtrack to exit the Untamed Thicket and head southeast in The Blood Vale to get back to Nafain.
Speak to Nafain, who reveals that he made a pact with Lilith to destroy the Knights Penitent. In exchange, he pointed her towards Eldhaime, where Astaroth's prison is located. He asks you to kill him to end the corruption flowing through him. The cutscene will end shortly afterward, and Fiorban will leave your party, lying down beneath Nafain.
This marks the end of the quest and you'll be granted 10,956 XP, as well as 1,500 Gold.
Buried Secrets
Return to Eldhaime Keep
At the end of Parting Embers and Stemming the Flow, you learned that Lilith is planning to free the demon Astaroth from his prison in Eldhaime. Walk to or teleport back to the Firebreak Manor Waypoint. Follow the path going southwest to reach your quest marker in Eldhaime Keep.
When you reach the gates of Eldhaime Keep, you'll find it overrun with demons. By the gate are several Blood Clan Marauders, Blood Clan Impalers, an Elite Blood Clan Shaman, and Talos Shivermaw, an Elite Bloodclan Mauler. Take your time defeating them and be careful not to get swarmed. Continue following the path northeast to get to your quest marker, and you'll encounter another hoard of Blood Clan Marauders, Bloodclan Maulers, and Blood Clan Impalers just past an archway. Defeat them, then head over to the quest marker.
This path into Eldhaime Keep is blocked and you'll have to find another way inside. Backtrack through the archway and continue heading south. Another group of Blood Clan Marauders, Bloodclan Maulers, and Blood Clan Impalers. While you're fighting them, you'll hear Commander Antje call out to you. Deal with the enemies, then destroy the barricade and speak to the commander.
Commander Antje informs you that they were overrun by Lilith and her beast. She then informs you of Donan's whereabouts and points you toward the door leading into Eldhaime Ruins. The quest will end here.
In Ruins
Enter Eldhaime Ruins
After learning that Donan was trapped within Eldhaime Keep, you will start by entering the Eldhaime Ruins [Diablo 4 Map Link], then head up the linear path. On the bridge outside, you'll encounter a few Blood Clan Marauders and Blood Clan Impalers. Open the door at the far end of the bridge, then open the next door immediately to your right.
In this room is another group of Blood Clan Marauders, Blood Clan Maulers, and Blood Clan Impalers. Circle the stairs going down, then head north. More of the same enemies will be in this upper section of the room. Head up the stairs, then head through the entryway on the right, where more Blood Clan Marauders, Blood Clan Maulers, and Blood Clan Impalers will be found on the bridge.
Cross the bridge and head down the stairs at the end. Defeat or run past the Blood Clan Marauders, Blood Clan Maulers, and Blood Clan Impalers in this room and head east. When you find yourself outside, head up the stairs to your north. An Elite Knightsbane will be waiting for you at the top. Defeat or run past it, then follow the linear path.
You'll be able to re-enter Eldhaime Keep at the end of the Eldhaime Ruins. Once you're in the keep, destroy the barricade and continue forward. Head down the stairs in the Eldhaime Keep Great Hall, where you'll find Donan honoring the dead. Speak to him and he reveals that he imprisoned Astaroth in a soulstone located beneath the keep.
In Ruins will end shortly, with Donan promising to lead you to Astaroth's prison.
Entombed Legacy
Enter Eldhaime Barracks
Donan offers to lead you to Astaroth's prison found underneath Eldhaime Keep. Head up the stairs on the north side of the Eldhaime Keep Great Hall, and enter the Eldhaime Barracks [Diablo 4 Map Link]. This first part of the path is quite straightforward and does not have enemies, so make your way forward at your own pace.
You'll eventually reach a quest area where Donan finds the corpse of one of Yorin's guards. He'll also find Yorin's mace, which makes him concerned about the well-being of his son. After he urges you to pick up the pace, climb down the ladder to the north. From here on out, there will be several enemies blocking your path, including Lycan Firewalkers, Lycan Terrors, and Mangy Hounds. Within the first group of enemies, you'll also find an Elite Lycan Terror.
Loot the chest up ahead, then continue forward, defeating the enemies in your path or simply running past them. You'll eventually reach the Hidden Tomb. Investigate Lilith's Blood Petals at the edge of the tomb to witness a vision of Lilith stabbing Yorin with the soulstone keeping Astaroth prisoner. When your character comments on having to defeat Yorin, Donan interjects, saying he has a plan.
You will be teleported back to the Eldhaime Keep Great Hall at the end of the conversation. Speak to Donan once more downstairs and he suggests meeting in Cerrigar, as he suspects the demons, along with Yorin, will be lingering there. The quest will end after this conversation.
Shadow Over Cerrigar
Join Donan to Cerrigar
At the end of Entombed Legacy, Donan asks you to join him in Cerrigar to try and catch up with the demons and find his son Yorin. Walk to Cerrigar or teleport to the Cerrigar Waypoint, then follow the quest marker northwest to reach Lower Cerrigar.
You'll find Donan by the quest marker. When you approach him, he will say a few things, then move towards the Lower Cerrigar Gate. Before you interact with the gate, make sure you're ready for a fight. When you're ready, interacting with the gate will trigger a cutscene. Donan calls out for Yorin, but Lilith answers him instead. She then calls forward Yorin, who has been completely taken over by Astaroth.
The end of the cutscene marks the end of Shadow Over Cerrigar.
As the World Burns
Fight Astaroth
- Boss Fight: Astaroth and Amalgam of Rage Gestation
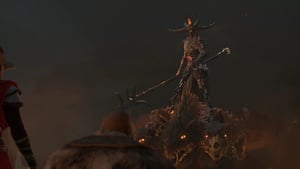
Astaroth had completely taken over Yorin's body and Donan is slumped to the ground, leaving him unable to fight. As soon as the quest starts, so does the boss fight against Astaroth.
Astaroth is riding atop the Amalgam of Rage Gestate, and his move set reflects this. Astaroth himself does two main moves. One is a melee move where he readies his staff, then performs one wide swipe in front of him. For the other, he swings his staff around once, which summons hellfire that falls from the sky. This move creates multiple fields of fire on the ground that hurt you when you stand in them.
The Amalgam has several moves of its own. His bite and pounce moves are similar to when you fought him in Fangs of Corruption. The main difference is that its pounce now also knocks you back. In addition, it also kept its ability to spawn minions, calling Mangy Hounds to battle whenever it howls. Its new move is the ability to spew 3 streams of fire from each of its heads.
Astaroth and the Amalgam will take turns performing their moves (i.e. the two will not perform an individual move at the same time). When Astaroth's health reaches the first triangle indicator, they will run away and move to the northern part of the settlement. Follow them north and jump over the debris to enter the next boss arena. On the way, hellfire will rain down on your location, so keep moving.
After reaching the second triangle indicator, they will relocate to the southeast. Once again, follow them, avoiding the raining hellfire. They won't move when you reach the final triangle indicator, so just keep dealing damage until you've depleted their health bar at that point. The biggest tip for this fight is to stay behind the boss as much as possible. Except for a few moves, most of the boss' moves hit a wide area in front of them. Staying behind the boss allows you to avoid getting damaged.
Once Astaroth has been defeated, Donan will run up to his body. Speak to him to initiate a cutscene of Donan mourning Yorin's death. After it's done, collect your boss's loot, then return to the Lower Cerrigar Gate in the west. Speak to the guard, and a short monologue narrated by Lorath with play. The end of the cutscene marks the end of the quest and the end of Act II.
Diablo 4 All Act 3 Main Quests Quick Navigation
The Spreading Darkness ♦ Whittling Sanity ♦ Suffering Disquiet ♦ A Moment to Collect ♦ Brought Low ♦ The City of Blood and Dust ♦ Small Blessings ♦ Whispers from the Past ♦ Through the Dark Glass ♦ Descent Into Flame ♦ Loose Threads ♦ Oasis of Memories ♦ Flesh from Bone ♦ Beneath the Mask ♦ Piercing the Veil ♦ Exhumed Relics
The Spreading Darkness
Journey to Ked Bardu
Begin your journey towards the waypoint that leads to Ked Bardu, a bustling town nestled amidst rugged landscapes. As you travel the untamed terrain, prepare yourself for encounters with enemies that stand in your path. Be ready to face off against the likes of Arsonists, Hornets, Marauders, Slicers, Beasts, and Firebrands, each posing a unique challenge that tests your abilities and resourcefulness.
With determination fueling your every step, you arrive at the imposing gates of Ked Bardu, their formidable presence a testament to the town's fortitude. As the gates open before you, venture inside the bustling streets that teem with life and intrigue. The air is thick with a palpable sense of anticipation as you navigate through the labyrinthine alleys, guided by the unwavering beacon of the waypoint leading you to your destination.
Following the quest marker to the Waypoint, your search for Lorath continues, leading you through the heart of Ked Bardu. As you traverse the vibrant streets, a chance encounter brings you face-to-face with Daruuk, a charismatic NPC is known for his jovial demeanor and tales of daring escapades. Intrigued by your purpose, Daruuk extends a helping hand, offering insights and guidance to aid you in your search for Lorath. Together, you navigate the labyrinthine streets, weaving through bustling crowds and colorful market stalls, each step drawing you closer to your goal.
Finally, through your efforts with Daruuk, he points out the figure of a slumbering Lorath, a victim of excessive revelry amid his quest. Concerned for his well-being, you carefully approach, armed with a bucket of water to awaken him from his intoxicated slumber. Lorath's eyes flutter open, his expression a mix of confusion and gratitude for your intervention.
Now fully awake and cognizant, Lorath reveals the gravity of the task at hand. He will ask you to locate a woman named Teckrin, a skilled courier who holds vital messages essential to the progress of your mission. With unwavering determination, you embark on a new chapter of your adventure, seeking out Teckrin amidst the labyrinthine streets of Ked Bardu, each corner revealing a new mystery to unravel.
After a series of intriguing encounters and exchanges, you finally cross paths with Teckrin, a woman shrouded in an aura of enigma and purpose. Engaging her in conversation, you deftly navigate the delicate dance of diplomacy and persuasion, successfully acquiring the crucial messages that Lorath so desperately seeks.
With the weight of the mission on your shoulders, you make your way back to Lorath to relay your encounter with Teckrin. This marks the end of the quest.
Whittling Sanity
Meet Lorath in Abaharu Canyon
- Boss Fight: Genbar, The Shrine Keeper
Embarking from the village of Ked Bardu, you will go on a journey toward Abahru Canyon. Along the way, be prepared to encounter enemies that may block your path. If you wish to acquire extra treasures and rewards, engage them in combat. Once you arrive at the designated Waypoint, you'll notice Lorath standing next to a lifeless body. Take the initiative to speak with him and unravel the events that have transpired. To your dismay, you will learn that the village has suffered a horrifying demon attack. In response, Lorath entrusts you with the important task of scouring the Canyon in search of any traces of Elias. As you ascend the canyon, stay on the right track by following the waypoint that guides you.
During your ascent, you will encounter demon adversaries and even stumble upon Treasure Goblins, which offer the opportunity to collect additional gold. Feel free to engage these foes and emerge victorious as you see fit. Upon reaching the upper reaches of the canyon, a sinister hell rift will materialize, unleashing a relentless onslaught of demons. Stand tall and dispatch each demon that emerges from the hell rift. Once the demonic threat has been vanquished, continue along the path to your left, as indicated by the waypoint, and venture towards the designated house. Inside the house, your mission will be to uncover crucial clues.
Take note that there are various interactive items within the house, but your primary focus should be on locating Genbar's Journal, which can be found on a table in the lower section. After acquiring the necessary information, engage in a conversation with Lorath. It will come to light that Elias has long since departed from the area, leaving you with the responsibility of uncovering the truth by tracking down Genbar. Follow the waypoint leading to the upper section of the canyon, where you will find Genbar engaged in prayer next to another hell rift. Engage in a series of dialogue exchanges with Genbar, which will eventually culminate in him transforming into the formidable mini-boss of this quest. Summon your strength and skills to overcome this challenging adversary through combat. Finally, after emerging victorious, engage in conversation once more with Lorath to bring this quest to an end.
Suffering Disquiet
Travel to Orbei Monastery
Embark on your journey towards the Orbei Monastery [Diablo 4 Map Link], where you can have a conversation with the Abbot of the area. While making your way there, be prepared to encounter enemies along the path, so if you desire additional loot, engage in combat and defeat them. As you reach the designated waypoint, the grandeur of the monastery automatically unfolds before your eyes. Step into the building and eliminate the Hornet enemies that guard its entrance, ensuring your safe passage.
Descend the staircase below and commence your search for the Abbot. Follow the straightforward path after reaching the bottom of the stairs, and eventually, you will arrive at an intersection. Turn left and continue on your way. Keep following the guiding waypoint, and eventually, you will stumble upon a crusader skull lying on the ground. This skull holds significance as you must place it on the Pedestal near the two closed doors that await the opening. Merely continue following the waypoint until you reach the Pedestal, and position the skull accordingly.
Once you enter the double doors, remain alert as you may encounter an ambush by Phantom enemies. Be prepared to defend yourself and emerge victorious. After dispatching the enemies, continue along the path and make a left turn until you come across a Raving Monk situated in the openness of a hall. Engage in conversation with the monk, and through dialogue exchanges, an unfortunate turn of events unfolds as a group of Phantoms attack and ultimately kill the monk. Rise to the challenge, fend off the attackers, and proceed towards another set of double doors located on the left side.
Forge ahead, following the waypoint, until you reach a sealed double door that necessitates entry. To gain access to the area beyond, your task is to find three words of the Secret Litanies. The first word can be found to the right of the doors, while the second word awaits discovery on the left side. After obtaining these two words, your journey continues as you follow the waypoint to uncover the location of the final word.
Once you have collected all three words, return to the front of the sealed doors and recite the litany, causing the doors to unlock. With the doors now unsealed, step inside and engage in a conversation with the Abbot of Orbei. After exchanging words, brace yourself for a transformation, as the Abbot morphs into the formidable Eidolon of Orbei Boss. Summon your strength and skill to defeat this powerful adversary. Emerging victorious against the Boss signifies the triumphant conclusion of this main quest, marking your achievement and progress in the game.
A Moment to Collect
Examine the demon's body
Once you teleport back to Ked Bardu, you will find yourself in familiar surroundings. Without delay, follow the guiding waypoint that leads you directly to Lorath. As you approach, prepare yourself for a short but meaningful conversation with him. This conversation sets the stage for the crucial task that lies ahead.
Once the exchange of words concludes, it is time to proceed to the room where the Autopsy awaits. Step inside, and as you enter, a captivating cutscene begins to unfold, unveiling the intricate process of the autopsy and the valuable discoveries made by Lorath. The cutscene immerses you in the intensity of the investigation, providing essential insights and clues to propel your journey forward.
As the cutscene reaches its conclusion, it signifies the end of this short but impactful Main Quest, leaving you with newfound knowledge and a deeper understanding of the unfolding events. Take a moment to reflect on the revelations unveiled during the autopsy, and prepare yourself for the next steps that await you on your heroic path.
Brought Low
Meet Lorath at Guulrahn
From your current location, embark on a journey guided by the waypoint that points you in the direction of Guulrahn, where you are destined to meet Lorath. As you traverse the landscape, keep an eye out for any potential challenges or encounters that may arise along the way. The path may take you through varied terrain, each step bringing you closer to your destination. Finally, after navigating through the area, you arrive at the Hidden Overlook, a special vantage point that offers a stunning view of the City, showcasing its vibrant and bustling atmosphere.
Take a moment to appreciate the panoramic vista laid out before you, the cityscape stretching out as far as the eye can see, with its towering structures and intricate details. With a sense of awe and curiosity, make your way toward Lorath, who eagerly awaits your arrival. Engage in a conversation with him, exchanging words that hold significance and shed light on the quest's purpose. It is during this interaction that a captivating cutscene commences, where visuals and dialogues unfold, immersing you further into the narrative.
Pay close attention to the unfolding events, as they may provide crucial information or reveal pivotal moments that shape the outcome of your journey. As the cutscene draws to a close, you can't help but feel a sense of accomplishment and fulfillment. The completion of this significant Main Quest is now marked, leaving you with a deepened understanding of the story and a sense of progress in your heroic endeavors. Take a moment to reflect on the challenges you have overcome and the knowledge you have gained, appreciating the growth and experience you have acquired along the way.
The City of Blood and Dust
Search for Oyuun and fight Akil
- Boss Fight: Akil, Jailer of the Weak
Prepare yourself for the journey into Guulrahn [Diablo 4 Map Link], a treacherous place that holds great challenges. The first step is to interact with the ladder that lies before you. Climbing up the ladder will transport you into the dark and foreboding Sanguine Alley, a place infested with dangerous adversaries such as the Maniac, Bloodhaw, and Executioner enemies. Be cautious as you make your way through this perilous path. Follow the waypoint guide that will lead you toward Market Square, but remember to stay focused and proceed straight until you reach an intersection where you'll take the second left path. As you continue, you will undoubtedly encounter more enemies, so be swift in dispatching them while continuing your forward momentum.
In due course, a path to the right will reveal itself. Take this path and then make a left turn, maintaining your course along the straightforward route. Keep a keen eye on your map, as a Quest marker will eventually appear, signifying your arrival at the sought-after Market Square. At this point, your objective shifts to locating Oyuun within this bustling area. Begin by turning left and scaling the wall that comes into view. As you ascend, you will come across an Executioner enemy pursuing a terrified villager. Dispatch the enemy swiftly, ensuring the safety of the villager, and then engage in conversation with them. The villager will provide valuable information, mentioning the possibility of Oyuun's captivity within the confines of the nearby prison. Your mission now is to locate this prison and rescue Oyuun from its clutches.
To find the prison, venture towards the left side of Market Square until you come across a path that beckons you onward. However, exercise caution, as an imposing elite enemy known as the Shocking Bloodhawk awaits your arrival. Defeat this formidable adversary and continue along your path. At an intersection, take a left turn and proceed straight until you reach the outer periphery of the prison. Upon entering the prison, veer towards the right and make your way to the opposite side, where you will be confronted by an open room housing another elite enemy. This time, your skills will be tested as you must defeat Akil, Jailer of the Weak before you can advance further.
Once Akil is defeated, proceed inside the prison cell and engage in conversation with Oyuun. Following your discussion, the next objective is to escape the prison using the secret path that Oyuun mentioned. Exit the cell, turning left to locate a Rusted Cell Door that you must open. Inside, you will find a weakened wall that needs to be destroyed. Progress straight ahead after dismantling the weakened barrier and eliminate any lurking corpse enemies that pose a threat. Once the area is cleared, guide Oyuun toward the prison's exit. Stepping foot beyond the prison's confines will signify the culmination of this Main Quest, granting you a sense of accomplishment for overcoming the trials and tribulations within Guulrahn.
Small Blessings
Escort Oyuun to Zolaya and Lorath
After successfully breaking free from the confines of the prison, your next task will be to accompany Oyuun as you traverse the challenging path known as the Trail of Bones. This journey will lead you toward the destinations of Zolaya and Lorath. The key to progressing through this trail is to simply stay on the designated path and engage in conversations with Oyuun upon your arrival at each location.
Once you reach your final destination, a captivating cutscene will unfold, signifying the completion of the Main Quest and bringing a satisfying conclusion to your adventure.
Whispers from the Past
Speak to Lorath at the Offal Pits
When you arrive at the entrance of the Offal Pits, speak with Lorath. Enter the Offal Pits together and follow the straight path. Eventually, you'll come across a group of enemies, including Bloodthirsty and Shivering Spiders and Ghouls. Defeat them and continue on the path until you find the entrance to the old escape tunnel. There, you'll discover a closed tomb with sword markings.
Talk to Lorath again and choose the dialogue option "Is this the place?" After a few conversations with Lorath, the door will automatically open. Now, your objective is to find a way into the palace. Enter the door and climb the ladder once you're inside. Turn left and follow the path to reach the palace walls, where you'll be instructed to eavesdrop on the conversations of enemies by interacting with the wall.
After listening in, head left and enter the palace through the Bowels/tunnel. Inside, interact with the door in the tunnel and go right to fight a group of Mother's Disciples and Mother's Chosen. Clear the area of enemies and continue straight, then make a right turn to find a staircase leading down. Eliminate the enemies in this area and discover a chest containing gold and a Weathered Tunic in the upper middle part. Proceed along the path and you'll encounter another chest with Pants and gold. After collecting the loot, return to the stairs and head in the opposite direction until you reach a set of stairs going up.
Keep following the path until you reach another interactable door. Upon entering the new area, a new group of enemies will appear, which you must defeat. Afterward, continue along the path to the right and climb up the next set of stairs. Turn left and follow the path until you reach the final set of stairs going up. This will lead you to the Tyrant's Court, where you'll engage in a mini-boss fight against Mother's Judgment.
Once you defeat the mini-boss, inspect the ward of sealing to the left path. Remove the sealing and enter the Sanctum of Elis with Lorath. Engage in a few dialogues with Lorath and begin searching for information on the Elias Ritual. In the middle section of the library, you'll find a piece of paper. After locating it, discuss your findings with Lorath and select the dialogue option "Here's what I found." Then, follow Lorath and speak with him outside the tomb, marking the end of this Main Quest.
Through the Dark Glass
Enter the Temple of the Primes
Embark on the next phase of your adventure by ascending the stairs before you and making your way towards the guiding waypoint, leading you to meet with Lorath at Mt. Civo. Upon your arrival, a brief yet captivating cutscene will unfold, offering insights and interactions between you and Lorath. Once the cutscene concludes, your new objective will be to escort Lorath to Baal's Shrine, conveniently located just ahead. Follow the waypoint, but be prepared to face numerous Disciple and Chosen enemies along the way. Engage in battle with these foes whenever you encounter them, ensuring your safe passage.
As you approach the first shrine, take a moment to interact with it, bestowing upon yourself the sacred blessing of destruction. This blessing will grant you strength and resilience as you continue your journey. Proceed towards the next shrine, which is known as Diablos's Shrine. Simply follow the guiding waypoint to the right, and once you arrive, interact with the shrine to acquire the Blessing of Terror. This newfound power will instill fear in your enemies, bolstering your prowess in combat. Finally, make your way toward the last shrine, known as Mephisto's Shrine, situated just below your current location. Traverse the path indicated by the waypoint until you arrive, where you will engage in conversation with Lorath. Following your discussion, interact with the shrine to attain the Blessing of Hatred. Upon doing so, a fiery portal will materialize before you, beckoning you to step inside.
As you pass through the portal, find and approach the Bloodied wolf, located near your initial point of arrival. Engage in conversation with this enigmatic creature, as it holds valuable information for your quest. With the guidance received, your next task involves traversing the area and obliterating two Barbarian Defenses that impede your progress. Only after defeating these barriers will you confront Gorm, whom you must vanquish to clear your path. Once Gorm has been defeated and the defenses lay in ruins, continue along the designated path until you encounter the Herald of Mephisto. It is essential to converse with this significant figure, as they hold crucial insights and further instructions for you to follow. Inevitably, another fiery portal will manifest, summoning you back to the presence of Lorath. Step into the portal, allowing it to transport you back to the familiar presence of Lorath, where you can engage in dialogue and share your discoveries.
Seize the opportunity to speak with Lorath, sharing the knowledge and experiences gained during your exploration. Engage in a meaningful discussion, shedding light on the profound revelations you have uncovered along your journey. This will mark the end of the Main Quest.
Descent Into Flame
Find the Ritual Location and slay Brol
- Boss Fight: Brol, The Tyrant King
Embark on a thrilling expedition as you follow the guiding waypoint alongside Lorath, leading you to the hallowed grounds of the Temple of the Primes [Diablo 4 Map Link]. Your journey will take you to this sacred location, brimming with mystery and ancient power. Upon reaching the designated waypoint, you will be faced with the task of gaining entry into the tomb, where the secrets of the Primes lie hidden. To enter this sacred space, interact with the imposing Gate of the Primes door, opening the path to your next adventure.
Once inside the tomb, your primary objective will be to locate the Ritual Location, an essential site within the depths of this ancient structure. Fear not, as there is but a singular path to follow through this area. With Lorath by your side, progress along the designated route, engaging and triumphing over any adversaries that dare to impede your progress. Stay vigilant and prepare to face various foes, as they will cross your path.
As you venture deeper into the tomb, suspense will arise. You and Lorath will become aware of a peculiar noise emanating from a nearby door. Brace yourself, for the Mini-Boss known as Malach will emerge from the very door that caught your attention. Engage in fierce combat with this formidable opponent, using your skills and prowess to eliminate the threat. Once Malach has been vanquished, resume your journey through the path, for the secrets of the Ritual Location lie just beyond.
Eventually, you will find yourselves standing on a cliff overlooking the Ritual location, with Lorath by your side. Engage in conversation with Lorath, exchanging thoughts and observations about the breathtaking sight before you. In due course, a lengthy and captivating cutscene will unfold, revealing significant events and shedding light on the mysteries that surround the Primes.
After the cutscene concludes, brace yourself for the ultimate challenge that awaits you. Prepare for an epic confrontation with the Boss of this level, none other than Brol, The Tyrant King. Engage in a monumental battle, utilizing your skills, strategies, and the blessings bestowed upon you throughout your journey. Overcome the formidable might of Brol and emerge victorious, solidifying your triumph and marking the triumphant conclusion of the Main Quest.
Loose Threads
Speak with the Mysterious Woman
Once you have emerged victorious in your battle against Brol during the previous quest, it is time to proceed further. Descend from the heights where the intense showdown took place and diligently follow the guiding waypoint that will lead you to a meeting with a mysterious woman. Move with purpose, as you navigate the path that will bring you closer to this enigmatic figure, eager to share her secrets and knowledge with you.
As you approach the designated location, you will come across a pair of doors that stand as a gateway to new possibilities. With anticipation building, take the initiative to open these doors, unveiling the path to engaging interactions and meaningful exchanges. Step forward and embrace the opportunity to converse with the enigmatic woman, as her words hold the potential to unlock hidden truths and propel your journey to greater heights.
Allow yourself to fully immerse in the unfolding dialogue that transpires between Taissa and Lorath, as they exchange thoughts, wisdom, and revelations. Through their heartfelt conversations, the pieces of the puzzle will come together, shedding light on the intricate tapestry of the Main Quest. As these dialogues progress, a sense of closure will arise, indicating that you have reached a significant milestone in your overarching adventure.
Embrace the significance of this moment, as it represents the culmination of your current questline. Reflect upon the knowledge gained and the connections formed during these interactions. The insights shared and decisions made will shape the course of your journey, guiding you toward new challenges and endeavors that lie ahead.
As the dialogue concludes, take a moment to appreciate the progress you have made and the growth you have experienced. Acknowledge the accomplishments achieved and the lessons learned, for they will serve as stepping stones for future quests and adventures that await you. With the Main Quest coming to an end, prepare yourself for what lies beyond, as your journey continues to unfold with endless possibilities.
Oasis of Memories
Meet with Lorath and Taissa in Tarsarak
Embark on a thrilling journey as you navigate from your current location toward the beckoning waypoint that leads you to Tarsarak, where Lorath and Taissa await your arrival. Prepare yourself for a lengthy hike, traversing through varied landscapes and overcoming obstacles along the way. The path to Tarsarak may be arduous, but the rewards that await are well worth the effort.
Upon reaching Tarsarak, seek out Lorath near the elegant fountain that graces the heart of the town. Engage in conversation with Lorath, taking the initiative to select the dialogue option that delves into the knowledge they have acquired about Elias's palace. By doing so, you will uncover valuable insights and gain a deeper understanding of the challenges that lie ahead.
After conversing with Lorath, the next step in your quest is to find a capable guide who can assist you and Lorath in the upcoming quests. Keep an eye out for the three pinned locations scattered around Tarsarak, each representing a potential guide who can aid you on your journey. Approach each nomad or guide in turn, engaging them in conversation and presenting your request for assistance. Although all three may initially reject your proposal, one of them, Abdus, will offer a helpful suggestion. Abdus will direct you toward an elderly man currently located at the Argentek River.
Before embarking on the journey to the Argentek River, it is essential to confer with Lorath once again. Engage in dialogue, ensuring that you are both prepared and aligned with your purpose before venturing forth. With your conversation concluded, set your sights on the Argentek River and commence your trek toward this new destination.
As you navigate the path towards the river, you may encounter various adversaries, including Marksman and Savage Beasts. Feel free to engage these foes in battle, vanquishing them to obtain valuable loot and earn experience points that will aid in your growth. Each victorious battle brings you closer to your goal, instilling a sense of accomplishment and fortitude.
Upon reaching the riverbanks of the Argentek River, your focus will shift toward locating the entrance to the drug den. Remain vigilant as you explore the area, as the entrance lies within a bar teeming with hostile individuals. Brace yourself for a fierce encounter, as the patrons within the bar will attempt to assail you. Rise to the challenge and eliminate these threats, ensuring your safety as you progress toward your objective.
Inside the confines of the bar, you will find an old man residing in a back room. Engage in a conversation with him, listening to his words of wisdom and guidance. This pivotal discussion will serve as a significant turning point, marking the conclusion of the main quest and setting the stage for new adventures and challenges that await you on the horizon.
Take a moment to reflect upon the journey you have undertaken thus far, appreciating the growth and knowledge gained along the way. The culmination of the main quest is a testament to your perseverance and determination, paving the way for future quests that will shape your destiny. Embrace the accomplishments you have achieved and eagerly anticipate the excitement that lies ahead in this vast and immersive world.
Flesh from Bone
Travel to the Forsaken Chapel
Embarking on a new leg of your journey, depart from the bustling town of Tarsarak and make your way towards the Forsaken Chapel located just outside its borders. It is here that you will reunite with Lorath and Meshif, two companions who will join you on this part of your adventure. Upon your arrival at the chapel, take a moment to approach Lorath, who stands alongside Meshif, ready to engage in conversation.
Engage in a brief but meaningful exchange with Lorath, absorbing their insights and updates on the current situation. Following this discussion, direct your attention to Meshif, eager to hear what he has to share. Conversing with Meshif will provide you with additional information and perspectives, equipping you with the knowledge necessary to navigate the challenges that lie ahead.
Once you have gathered the necessary information from your companions, it is time to venture forth, leaving the shelter of the chapel and braving the storm that rages outside. As you embark on this treacherous journey, keep a watchful eye on Meshif, who unexpectedly halts in the middle of the path. Demonstrate your concern by checking on him, ensuring that he is safe and ready to continue onward.
Resuming your travel, follow Meshif through the storm, enduring the onslaught of fierce winds that threaten to impede your progress. Seek shelter in a suitable spot, providing respite from the howling gales. As you wait, take a moment to interact with Meshif, acknowledging the challenges faced together and steeling yourselves for what lies ahead. Embrace the camaraderie shared between you, knowing that your combined strength will carry you through even the harshest of storms.
Once the winds relent, press forward once again, shadowing Meshif as he leads you through the tempestuous sandstorm. Be prepared, for the winds may rise in intensity once more, requiring you to seek refuge alongside Meshif. Hunker down, taking shelter until the worst of the storm subsides, ensuring your safety as you continue your arduous journey.
As you push forward, your resilience will be tested when a swarm of enemies suddenly ambushes you. In this perilous moment, it becomes your duty to protect Meshif and Isabella, warding off the assailants with unwavering resolve. Stand united against the onslaught, drawing upon your skills and companionship to emerge victorious.
Undeterred by the trials faced, persevere through the storm until you finally reach the Outer Gardens. This significant milestone marks the conclusion of the main quest, signifying a moment of accomplishment and growth. Take a moment to savor the magnitude of your progress, appreciating the challenges overcome and the bonds forged along the way. With the main quest completed, prepare yourself for new adventures that await in the uncharted territories of this vast world.
Beneath the Mask
Find the entrance to Exalted Terrace
As you reach your destination just outside the area, take a moment to engage in conversation with Meshif, ensuring that you are both prepared and aligned with your purpose before venturing further. His insights and guidance will prove invaluable as you navigate the challenges that lie ahead.
With your discussion concluded, your next objective is to locate the entrance that grants you access to the inner sanctum. Follow the guiding waypoint that directs you toward the upper part of the area, where you will find yourself in the presence of a noble figure. Approach the noble and initiate a conversation, exchanging words that hold significance and may shed light on the path that lies ahead.
The noble's words hold weight and influence, offering insights and instructions that will shape your next course of action. As the conversation reaches its conclusion, the grand doors of the Exalted Terrace will majestically swing open, revealing a glimpse into the opulence and secrets that await within. This pivotal moment marks the end of the main quest but also serves as a gateway to new possibilities and adventures that await you within the confines of the palace walls.
Piercing the Veil
Recover the Sightless Eye
Prepare yourself as you step into the hallowed grounds of the Exalted Terrace [Diablo 4 Map Link], embarking on a search for the elusive figure known as Elias. Within this sacred space, you will find tranquility, for no adversaries are lurking in the shadows, allowing you to traverse the area unhindered and without fear.
As you make your way through the terraces, absorbing the serene ambiance that surrounds you, the path will eventually lead you to the culmination of your quest. Standing before the imposing double doors that guard the presence of Elias, you will encounter another noble individual stationed nearby. Engage in conversation with this noble, exchanging words that may hold valuable insights or provide guidance for the encounter that awaits you.
Armed with the knowledge acquired from the noble, step forward alongside Lorath and venture through the grand double doors, ready to confront Elias himself. Engage in a dialogue with Elias, seeking answers and confronting the truth that lies at the heart of your quest. However, the situation takes a dramatic turn as you find yourself compelled to temporarily subdue Elias, allowing you to investigate the curious blood petals left behind in his wake.
As you immerse yourself in the investigation, a captivating cutscene unfolds, offering glimpses into a world shrouded in mystery and intrigue. The events that transpire deepen the enigma surrounding Elias, leaving you with more questions than answers.
With the cutscene drawing to a close, Elias returns, seemingly resurrected, but this time infused with newfound power and accompanied by the formidable Champion of Lilith. Prepare yourself for an intense battle, as you must once again confront Elias, drawing upon your skills and determination to overcome this formidable challenge.
After successfully vanquishing Elias once more, the urgency to locate the Sightless Eye becomes paramount. Ascend the stairs, following the path where Elias stood, remaining vigilant as you encounter a few enemies that seek to impede your progress. Press onward, undeterred by the obstacles that lie in your path.
As you traverse the path, an open area unfolds before you, revealing the presence of yet another iteration of Elias. Summon your strength and determination to defeat both the spawning enemies and Elias, demonstrating your unwavering resolve.
With the adversaries defeated, take a moment to regroup and converse with Lorath, exchanging thoughts and insights on the events that have unfolded. The time to escape has arrived, and your means of departure lies within the window. Make your way towards it, embracing the thrill of freedom as you escape the clutches of this enigmatic realm.
With your escape accomplished, this momentous sequence of events marks the conclusion of the main quest, leaving you to contemplate the mysteries that remain unsolved and the adventures that lie beyond. Prepare yourself for what lies ahead, for the path forward is paved with new quests, challenges, and revelations in this vast and ever-unfolding world.
Exhumed Relics
Return to Forsaken Chapel
As you make your daring escape from The Exalted Terrace, hasten your footsteps towards the familiar presence of Meshif. Approach him swiftly, and engage in conversation to share the experiences and revelations that have unfolded within the terrace. Brace yourself, for a brief yet captivating cutscene that will transport you to the solemn grounds of the Forsaken Chapel, where the next chapter of your journey unfolds.
Within the sacred confines of the chapel, Lorath, the wise and discerning companion, awaits your arrival. Initiate a conversation with Lorath, sharing the details of your escape and the events that led you to this pivotal moment. As you exchange words, a profound sense of anticipation fills the air, for the Sightless Eye, a mysterious artifact of great significance will now be brought forth for study and examination.
Prepare yourself for a momentous occasion, as a lengthy cutscene takes center stage, immersing you in a tapestry of revelations and profound insights. This carefully woven narrative unfolds before your eyes, shedding light on the secrets and truths that have remained obscured until now. Through this cinematic journey, you will find answers and gain a deeper understanding of the enigmatic world you inhabit.
The end of the cutscene will mark this quest as completed.
Diablo 4 All Act 4 Main Quests Quick Navigation
Prying the Eye ♦ A Master's Touch ♦ Lost Arts ♦ A Meeting of the Minds ♦ Anguish Incarnate ♦ Eye of the Storm
Prying the Eye
Prepare the Sightless Eye
The first quest that you will receive after finishing Act 3 is Prying the Eye, where you need to travel to the Forsaken Chapel to meet with Lorath. After the cutscene, look for Taissa who's resting on the couch, and ask her how she's feeling. After learning in the last quest that Lilith has made a pact with Astaroth and she now holds a key to hell, Lorath will ask for your assistance to set up the Sightless Eye.
Lorath will walk up to the pedestal and he will ask you to bring the Sightless Eye which is located next to the chapel pews. Walk up to it then place it on the pedestal. Next, Lorath will ask you to gaze into Sightless Eye while picturing Lilith, which will allow you to get in contact with Lilith. This will trigger a cutscene that will show Lilith's plans and who is with Elias. After a short while, Lilith feels your presence and sees you. The gaze is ended immediately.
Next, Lorath explains the dangers of Lilith consuming Mephisto's power, which will transform her into a prime evil that can conquer Hell and the Sanctuary. Lorath proposes an idea that will stop her from doing so, and they'll need the help of an old ally back in Kyovashad. The end of this conversation will mark this quest as completed.A Master's Touch
Meet Donan at the Cathedral of Light
From the chapel where you last spoke with Taissa and Lorath in Kehjistan, you've learned more about Lilith's plans through the use of the Sightless Eye. Lorath proposed in the previous quest to seek the help of an ally named Donan. Look for him in Kyovashad and hand him the letter from Lorath. He will ask you to travel to the Horadric Vault for more insight, as he gathers the resources he will be needing.
The end of this conversation marks the end of this quest.
Lost Arts
Enter the Horadric Vault at Mistral Woods
After your interaction with Donan, you will now travel to Mistral Woods to find the Horadric Vault. Inside, Donan will be waiting for you. Once you are at the sturdy door, talk to Neyrelle to trigger a cutscene. This will start an argument between Donan and Neyrelle, and you will continue deeper into the vault where Donan will unlock a door.
Continue into the gallery and beware of the monsters lurking. Donan will walk up to his desk to acquire his old notes, and in the same room, there's a door where a magical barrier is protecting it from intruders. Walk up to it so Donan can unlock it. More enemies will be waiting on the other side.
Donan will need more of his notes and you will need to explore the vault further. Be careful of enemy ambushes and make sure to clear out all of them to protect Neyrelle and Donan. As soon as he gathers his notes from his third and final desk, more enemies will swa this time. Once all of the enemies have been defeated, Donan will remove the seal to leave the study. Finally, speak to Neyrelle to complete this quest.
A Meeting of the Minds
Meet at the Forsaken Chapel
Through your collective efforts with Donan and Neyrelle, you have successfully recovered Donan's notes in the vault, you will now return to the Forsaken Chapel in Tarsarak [Diablo 4 Map Link] to meet with your allies and then speak to Neyrelle to trigger a cutscene.
Neyrelle walks out of the chapel to look for Taissa, and you will follow Neyrelle. Taissa can be seen captured and restrained by Elias and then Neyrelle runs up to Taissa to free and protect her. This marks the end of this quest. complete the quest and immediately start the next, Anguish Incarnate where you'll fight against a boss, Andariel, Maiden of Anguish. Completing this quest yields XP and Gold.
Anguish Incarnate
Fight Andariel
- Boss Fight: Andariel, Maiden of Anguish
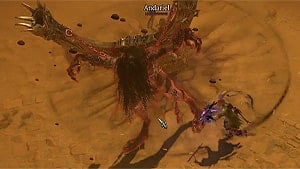
Your main objective here is to fight and vanquish Andariel. The mighty maiden tied to a wooden structure is seen constantly battling in pain. Andariel will fight by spawning statues around the arena that can cast different effects and attacks. It is recommended to destroy these statues if you can to prevent them from overwhelming you with their attacks. This will allow you to focus on Andariel later on. Beware of the AoE attacks from Andariel and watch out for the rings that will appear on the ground.
Once Andariel sustains a significant amount of damage, it will cause her to retreat and shoot out projectiles before reappearing. It's easy to avoid the projectiles by dodging or simply running. Once you've applied about 40-45% damage to Andariel's health, the boss will fall to the ground and spider-like limbs will emerge from its back, making it more aggressive with its movements.
Andariel will now be able to chase you and will have a longer reach with its sweeping attacks, a good tactic is to dash and attack from behind or the sides to avoid getting hit in the front. Continue avoiding her attacks by evading and using any skills at your disposal. Keep attacking her while securing your safety. Defeating this boss will yield you XP, Gold, and other valuable drops. This will also mark the quest as completed.
Eye of the Storm
Speak with Lorath
Defeating Andariel is a great feat, and after doing so, you will now speak with Lorath again who is preparing to leave with Donan. This short conversation marks the completion of this quest, and this will also complete Act 4.
Diablo 4 All Act 5 Main Quests Quick Navigation
The Path Divided ♦ Secrets of the Zakarum ♦ Entombed Hatred ♦ Swamp Hospitality ♦ Witch of the Wastes ♦ Encumbered Mind ♦ The Cage of Grief ♦ One Step Forward ♦ Tainted Flesh ♦ Wrack & Ruin ♦ Cold Blood ♦ Judgment of the Swamp ♦ The Serpentine Path ♦ Dirge of the Mire ♦ The Slow, Beating Heart ♦ A Cold and Lifeless Shore ♦ Picking Through the Bones ♦ Beneath the Wine-Dark Sea ♦ Fragments of Mortality ♦ On the Precipice ♦ Knee-Deep in Faith ♦ A Chorus of Voices
The Path Divided
Meet with allies in Zarbinzet
The Path Divided is the first quest that you will receive in Act 5. Shortly after completing Act 4 wherein you battled with Andariel, your next objective now is to meet up with your allies. You will now look for Taissa to progress forward. To do this, follow the path going Donan and ask if he will be joining Lorath and Neyrelle in the swamp.
After your conversation with Donan, your quest will be marked as completed.;Secrets of the Zakarum
Enter Zakarum Keep
Donan has decided to join you in your quest, but before they begin, he has asked for your assistance to attune the Soultstone to Mephisto's Essence. To do this, travel to the Ruins of Rakhat Keep Inner Court [Diablo 4 Link]. Activate the Waypoint upon arriving then proceed to the campsite where Donan is waiting.
After your conversation with Donan, your next objective is to find a way into the Zakarum Keep. This is located Northwest of your quest area marked on your map. Continue following the marker until you find a damaged well, and climb your way to the top. Continue to look around until you find the entrance to Gate Winch. Raise the portcullis to continue this quest and Donan will be waiting on the other side. Follow Donan into the main gate and speak to him after opening it. This will mark your quest as completed.
Entombed Hatred
Search the Foul Undercrypts
After Donan opens the door to the Foul Undercrypts [Diablo 4 Map Link], your next objective is to fight the Ancient Paladin and his guards waiting on the other side. The elite enemy Ancient Paladin can be easily defeated by using AoE (Area of Effect) skills and attacks. Once you have defeated all of them, destroy the door that they were guarding. Then continue to the Black Tomb of Sankekur together with Donan.
While Donan is in the process of attuning the Soulstone, he will be defenseless so you will be in charge of protecting him from the monsters that will spawn. Beware of the monsters that can teleport and summon mobs. Defeat all the enemy waves then speak with Donan after. This will mark the quest as completed, then your next objective is to travel to Wejinhanni.Swamp Hospitality
Travel to Wejinhani
Your next objective is to meet up with Donan in Wejinhani [Diablo 4 Map Link]. Upon arrival, you will find Donan speaking to a local first, so explore the area and unlock the Waypoint first. Next, you will travel with Donan to find Taissa in the RuinedTower. After locating Taissa, this quest will be marked as completed.
Witch of the Wastes
Look for Valtha in Cinder Wastes
Beginning from the Ruined Tower, your next destination is Cinder Wastes where Valtha is waiting for you. Simply look at the pinned location on your map or the Northeastern area from your current location. Follow the quest marker and beware of the enemy encounters. It is up to you whether you want to fight them or outrun them. Keep going until you reach Valtha's Hovel.
Valtha is a witch who can cast magical spells against you. Her movement is relatively slow and she takes her time casting her powerful magical spells. During this time, it's ideal to attack her while she's defenseless. Valtha can cast meteors that will fall from the skies, watch out for the red glowing marks on the ground to avoid getting hit by her spells.
Aside from casting powerful spells, Valtha can also call on mobs to assist her in her fight. Keep on hitting Valtha until she reaches a lower health and she will become more desperate, and she will conjure more powerful enemies. Once you defeat her, she drops a Vial of Purified Quicksilver. Take this with you and bring it back to Donan who is stationed at the Ruined Tower in Wejinhani. Look for Donan and Taissa and then he will give you instructions on what to do with the vial.
When you're done with the last task from Donan, this will mark the quest as completed.
Valtha is also capable of summoning mobs to assist her in combat, you'll see blood seals on the ground when mobs will appear. If this happens quickly take out the summoned enemies then shift your attention to Valtha to continue pressuring her with attacks. Once she reaches low health, more summoning circles will appear in the arena, make sure to slay her quickly to avoid getting outnumbered by mobs. Upon defeating her, make sure to grab the items that drop from her and the Vial of Purified Quicksilver.
Encumbered Mind
Help Donan fix the Soulstone
After discovering that Valtha has been working with Lilith and the demons, you are now tasked to complete the Soulstone by Donan. Your first task is to place the Vial of the Purified Quicksilver on the table. Interact with the fire next to Donan, then on the table next to the fire, and finally, the grinder nearby.
After your task, Donan will move to the center of the room to speak. He was hoping that this will complete the Soulstone but unfortunately, it doesn't do anything to it. Taissa heads outside and you follow her. Taissa voices out that it isn't working because Donan doesn't trust himself. She comes up with a plan to fix this and you agree to follow her to the nearby swamp. This conversation marks the completion of this quest.
The Cage of Grief
Travel to Hungering Swamp
Due to Donan's failed attempt of completing the Soulstone, Taissa suggests visiting the Hungering Swamp [Diablo 4 Map Link] to help Donan overcome his grief. Follow the quest marker found east of the Ruined Tower until you reach the trail there. Enter the Hungering Swamp once you reach your destination.
Continue going into the swamp until you find a hut located in the northern part of the swamp. Taissa will share that Valtha once brought her here to face her demons. She is hoping that Donan will be able to do the same here. Before the ritual, she asks for Maggot Queen Ichor and a Yellow Lotus that will help ensure their success. While you go look for these items, enemies nearby will be attacking you. Simply collect the gathered materials and then return to the hut.
Place the two ingredients in the pot next to Taissa who has been eagerly waiting for. your return. Next, she will ask you to light the three braziers in the hut, then, a cutscene will begin. All three of you will take part in the ritual. Both you and Taissa will fall asleep, while Donan relives the grief of losing his son Yorin.
Upon returning to your senses, you'll find a Fiery Portal inside the hut. You look around but there are no signs of Taissa and Donan. Fearing for them, you enter the portal where you'll meet Mephisto. He proposes that he will be joining in the quest to find Lilith and has asked for the others to deal with Elias. After your conversation, a new Fiery Portal will be summoned that will send you back to Sanctuary.
You will find yourself at the Ruined Tower where Taissa is currently stationed. This will mark the quest as completed.
One Step Forward
Help Donan fix the Soulstone
Now that you are in Ruined Tower, your next task is to speak with Donan who has just participated in the ritual to face his grief of losing his son. Next, he will ask for your help in restoring the Soulstone once again. The ingredients can be found in the same area as when you first got them. The same thing will follow. Mixing the quicksilver on the table, spinning the wheel next to Donan, the grinding the sulfur next to it. Afterwards, Speak to Donan who will successfully restore the Soulstone the second time.
This proves that the ritual proposed by Taissa worked and this will mark the quest as completed.
Tainted Flesh
Find Lorath and Neyrelle
The next objective is to look for a person named Timue, who can help break Elias' immortality. To begin your journey, you will need to travel to Blightmarsh in Hawezar to meet up with Lorath and Neyrelle. you'll find them right in the middle of the quest area. Once you spot them, your allies will start following you.
While you search for Timue in the next quest area, you will encounter Arachnid Horrors, Nangari Oracles, Nangari Spitters, and Toxic Lurkers. If you'd like to sidetrack a little, an Altar of Lilith can be found in the north-northeast part of the quest area. To progress, however, head to the southeast section of the quest area, where you'll find a path to Timue's Hovel. Open the door, and head in to speak to Timue.
At first, Timue seems reluctant to send the young girl Neyrelle to go after demons but she eventually agrees and informs the group about the Tree of Whispers in the town of Yngovani. This approval from Timue will mark the quest as completed.
Wrack & Ruin
Search the town of Yngovani for the eyes
From the previous quest, you learned that it is likely that Elias made a deal with the Tree of Whispers which granted him immortality. To undo this, your first objective is to find the town of Yngovani. The town will be located right in the middle of the quest area, then head inside the temple. Monsters will be spread out in the town, beware of their ambushes.
Look for the engraved stone door once you make it inside the temple. Your group figures out that the only way forward is to return the Engraving Eyes. From your map, you will see two quest markers where the eyes are located separately in the area of Blightmarsh; the Left eye is located up North, while the Right eye is located in the East.
Start by heading north, defeating or running away from the Nangari Oracles and Serpent Cultists. Within the Left Eye's quest area, you'll encounter some Serpentcallers, Serpent Cultist Magus, Skeletons, Skeleton Archers, Spike Fiends, and Swamp Walkers. You'll also find a few cultists gathered around red circles performing some rituals. If you defeat them, Elite Serpent-type Summoners will appear and can be defeated. While they aren't required to progress the quest, you may find them to be a good source of loot.
To progress, head to the cross-section of paths just slightly above the center of the quest area. There, at the Thieves' Encampment, you'll find some Nangari Oracles, Nangari Spitters, and Skeletons attacking a person. Defeat all the enemies, then talk to the dying bandit. After your conversation ends, he'll die, dropping the Left Eye. Pick it up and head southeast to the quest area for the Right Eye.
In this quest area, you'll find more of the same enemies as in the previous area. Simply head to the east section to find the Destroyed Serpent Shrine. At the top of the steps leading to an altar, you'll find the body of a Half-Devoured Cultist. Search it to find the Right Eye. When you do so, however, some Nangari Spitters will appear from the ground. Defeat them, then head back to the Yngovani temple.
Interact with both Eye Sockets to put the eyes in. After you do so, the door will open and this will mark the quest as completed.
Cold Blood
Search Slithering Dark and fight Mohlon
- Boss Fight: Mohlon, Snake Queen
- Rewards: Dagger, Mohlon's Fang
Head inside the door that you have just unlocked, then follow the path on the left. In this area, you'll run into some Nangari Spitters, Plague Swarms, Plagued Creepers, Serpent Cultists, and Elite Nangari Longfangs. When you get to the Serpentine Passage, you'll get to a few splits. To progress forwards, take the northwest path at the first split, then take the southeast path at the second. You'll know you're at the right place when you find a Healing Well. Interact with it to stock up on Health Potions, then prepare for a boss fight and head north.
At the end of the large room, you'll find the Incense Box that Timue sent you out to look for. When you interact with it, you will be momentarily stunned and Mohlon, Snake Queen will appear from the ground next to you. The first thing you need to watch out for are the piles of Hatching Eggs on the ground. If you stand on them for too long, they will explode, dealing significant damage. Though they can be destroyed, you can also opt to step on and off them twice to trigger their explosions without being in their radius.
Mohlon is not a boss you can simply stand behind to avoid damage; watch her telegraphed attacks for an idea of what she will do next. For one move, she rears her head backward and then spits a stream of poison in front of her. For another, she stretches her tail out for a brief moment, then swipes her tail in a large arc in front of her, dealing damage and knocking you back a far distance.
The move you need to look out for the most, however, is one where she summons an eyeball in her right hand. After she does this, five eyeballs will start revolving around her, then after a few seconds, she will shoot them out around her. Once on the ground, each eyeball will start tracking you, then shoot a petrifying light that stuns you when hit, allowing Mohlon to get some free hits on you. Keep moving when the eyeballs are on the ground to make it harder for them to track you.
After taking her to about 75% and 25% health, she spawns in a Nangari Longfang. After all the enemies have been defeated, you can loot the Incense Box, then return to Yngovani via the rope to the right of the box. Lorath and Neyrelle will be waiting for you at the top. Speak to the to learn that you need to perform the ritual with the incense at a nearby altar.
Defeating the boss will mark this quest as completed and you will receive a Dagger, Mohlon's Fang, together with XP and Gold.
Judgment of the Swamp
Defeat the Nangari
After defeating Mohlon, you were able to retrieve the incense needed to find the Tree of Whispers. You will now head Northeast to meet up with Lorath and Neyrelle at the Misshapen Labyrinth. Approach them and follow them up to the Bloodstained Altar where Nangari enemies are waiting. Clear out all the enemies then interact with the Healing Well nearby. Next, light the incense on the altar when you're ready, and shortly, a cutscene will play.
The three of you are seen drifting in and out of sleep, after a while, it will end with Neyrelle waking you up and this will mark the quest as completed.
The Serpentine Path
Follow the Serpent
After the ritual in which the 3 of you previously participated, Neyrelle wakes up and mentions that she sees something. Follow her and she will lead you to a body of a serpent. After this, speak to her and the truth comes out that only 2 of you can see the Serpent, meanwhile, Lorath can see a cloud of smoke.
Follow the Serpent's path where you will be encountering more Nangari enemies. Once you make it to the Sinking Detritus, Lorath will mention finally being able to see the serpent. Shortly after, you will be ambushed by more Nangari enemies. In the middle of the chaos, Neyrelle gets separated from the group and will run toward a small path underneath the Serpent. Keep on fighting off the waves of enemies until you hear Neyrelle call out to you, and she will drop a ladder. Use this to climb up and onto the enom-Drenched Path to escape the Sinking Detritus.
This will mark the quest as completed.
Dirge of the Mire
Travel to Voiceless Grove
After fighting your way out of the Serpentine Path, you will now find yourselves in the Venom-Drenched Path. Speak to your allies Neyrelle and Lorath who are both hearing voices. To continue your quest, you will travel to the quest area where you will encounter more enemies. Eventually, you'll find a section where the serpent is wounded. Attack the wounded serpent and then it will disappear, allowing you to continue your journey.
Continue the path until you see some Dead Trees, and then destroy them to reveal a path that will allow you to enter the Voiceless Grove. The Serpent will block your path again while your allies are engaged in a conversation and in that same moment, a Wailing Soul will appear before you. Destroy all the enemies that will show up including an Elite Spirit named Nikola. After that, you will now escort Neyrelle into The Swamp of Vanished Souls. This will mark the quest as completed.
The Slow, Beating Heart
Speak to the Tree of Whispers
After fighting your way out of the Voiceless Grove, you will now speak to Neyrelle about the voices that you're hearing while traveling the path north. There are no enemies in this area which will allow you to go on a leisurely pace. Eventually, you will run into the serpent and this time around, you can now walk back to reach the Tree of Whispers.
Interacting with the tree will trigger a cutscene wherein The Tree will agree to help you locate Elias in exchange for bringing his head back to the tree. It will point you toward a coffin on the Eastern coast. After the cutscene, you will now speak with Lorath which will mark the quest as completed.
A Cold and Lifeless Shore
Go to the Eastern Shore
After your encounter with the Tree of Whispers, you are now tasked to look for a coffin that will let you discover Elias' secret to immortality. Head to the middle of Rotspill Delta in Hawezar to locate Lorath and Neyrelle. Here you will discover what happened between him and Elias. After the conversation, head to the shipwreck and climb up. Your character will spot something in the distance and after your conversation with Neyrelle ends, the quest is completed as well.
Picking Through the Bones
Look for the coffin beyond the shipwreck
At the end of A Cold and Lifeless Shore, you and your allies spotted the coffin mentioned by the Tree of Whispers across some wreckage on the eastern shores of Hawezar. Head back and off the wrecked ship, then make your way southeast towards another wreckage. You'll have to follow and jump across these wrecked ships to get to your destination. On your way, you'll encounter some Plague Maggots, Quartermasters, Raiders, Reavers, and Skulkers.
You will eventually get to a barred door. Neyrelle suggests that she open the door from the other side. While she does that, you will have to defend yourself from a wave of Reavers and a Quartermaster. Deal with them quickly, as you'll hear Neyrelle scream from the other side of the door. Destroy the Waterlogged Door, then save and speak to Neyrelle.
Unfortunately, when Neyrelle got attacked by the drowned, it infected her with necrosis. To stop it from spreading, Lorath is forced to cut off the infected arm. With Neyrelle unconscious, Lorath tells you to go look for the coffin on your own. Continue following the path forward, jumping from wreckage to wreckage, and you'll eventually find the coffin at the end.
Inspect the coffin, and you'll be transported to the Epiphysis Entrance. The quest will end here, granting you some XP and Gold. The next quest, Beneath the Wine-Dark Sea, will begin right after.
Beneath the Wine-Dark Sea
Uncover Elias' Secret
At the end of Picking Through the Bones, you successfully found the coffin leading to the Temple of the Deathspeaker housing Elias' secret. Head forward and interact with the Echo of Elias. After it disappears, head in and through the path on the right. You'll encounter some Putrid Remains, Skeletons, Skeleton Archers, Skeleton Captains, and Skeleton Corpse Axe as you move through the temple.
The path ahead will split in two; one going northwest, one going northeast. Take the path going northeast, and keep heading forward at the next split. At the very end, you'll find another Echo of Elias to dispel. Continue down the path to the right and at the corner, don't take the left, it leads to a dead end. Instead, attack the weak pillar to the right to reveal another path.
The path forward is relatively linear for the most part. When you get to the split, head straight forward towards the northwest. In the next room, you'll find a third Echo of Elias. Backtrack back to the previous split in the path, and head down the path you didn't take earlier going towards the northeast. Up ahead, you'll be able to either continue down the path or head down some steps. Continue down the path and you'll find the final Echo of Elias in the room at the end.
Backtrack back down the path and take the steps going down. At the split heading either forward or to the right, keep heading forward into the Corrupted Marrow. Follow the path to the end to find Elias' Mummified Finger. Collect it and the temple will start flooding. The quest will end here, granting you some XP and Gold. You will wake up back with Lorath at the beginning of Fragments of Mortality.
Fragments of Mortality
Burn Elias' Finger
At the end of Beneath the Wine-Dark Sea, you found the secret to Elias' immortality. Though you passed out at the end due to the temple flooding, you wake up back with Lorath and Neyrelle at the start of this quest. Speak with Lorath and tell him about what you found at the temple. He will tell you to burn Elias' finger, which you can do by interacting with the nearby campfire.
Neyrelle will then regain consciousness. Speak to her, addressing her fears of being left behind, then the quest will end, granting you some XP and Gold. If you've finished the Main Quest One Step Forward, On the Precipice will unlock. If you have not, however, your next course of action is to complete Secrets of the Zakarum.
On the Precipice
Travel to Black Tomb of Sankekur and fight Elias
- Boss Fight: Elias, Fallen Horadrim

You will now be rejoining your allies and performing the ritual on the Soulstone. To do this, you will travel to the Ruins of Rakhat Keep: Inner Court Waypoint, then speak with Donan right next to the waypoint. Donan will ask you to follow him to enter the Foul Undercrypts [Diablo 4 Map Link]. You will be preparing for a fight, then speak to Donan when you are ready.
You will be watching over as Donan, Lorath, and Neyrelle are performing the ritual. Suddenly, Taissa will notice Elias who is entering the tomb. Go after Taissa to confront Elias. Make sure to stock up on potions and that you're ready for a boss fight. There's a Healing Well nearby and then the fight against Elias, Fallen Horadrim will begin.
Elias largely has the same move set as his encounter during Piercing the Veil; as he loses more health, he summons more minions to his side. There are two moves, in particular, to watch out for. One is the red-homing projectiles he summons when he lifts his right arm. If this move is dealing a lot of damage to you, try to move around the arena more to make it harder for the projectiles to track you.
Another move to look out for is the waves of blood he summons every quarter of his health is lost. When you get hit by this move, you will become vulnerable, taking increased damage from the boss. You can visualize these blood waves that slice around Elias. There will be indicators showing where the slices will hit before the waves themselves come out. Stand in the gaps between each slice to be safe from this move.
After you take Elias down to a sliver of HP, he becomes enraged and flees after learning that you have discovered the secret to his immortality. The end of the cutscene will mark the completion of this quest.
Knee-Deep in Faith
Track Elias with Taissa through the Plaguemarsh
After you and Taissa confronted Elias and your allies performed the ritual on the Soulstone, you will now follow the path to the west that will lead to Plaguemarsh. There will be ghouls on your way there but they are fairly easy to handle. When you get to the target location, speak with Taissa and then Lorath will rejoin you to continue the search for Elias.
Follow the path east, defeating or running past the Plague Swarms in your way, and you'll find Elias at the end slumped by the wall. Speak with Lorath to trigger a cutscene of a conversation between him and Elias. After they've finished speaking Taissa will take Elias' head to take it to the Tree of Whispers.
Once again, speak to Taissa after the cutscene ends and she will announce that she's leaving the group. Donan and Neyrelle acknowledge this and they will start to wonder where Lorath has gone. They have reasons to believe that he may have made a deal with the Tree of Whispers to help them look for Lilith. The end of this conversation will mark this quest as completed.
A Chorus of Voices
Return to the Tree of Whispers
To fulfill your promise to the Tree of Whispers, take Elias' head with the hopes to catch up with Lorath. You'll be able to find him near the waypoint. Speak with Lorath to trigger a cutscene. He begins by explaining that he had no choice but to make a pact with the Tree of Whispers to get information on Lilith's location. He did not reveal what he will be exchanging this with but he informs you that Lilith is currently un Caldeum and will ask the party to reconvene in Tarsarak.
Shortly after, Lorath will narrate a monologue to tell the story of what they have accomplished so far. This marks the end of the quest and Act 5 altogether.
Diablo 4 All Act 6 Main Quests Quick Navigation
Evil Stirs in Kehjistan ♦ The Jewel of the East ♦ The Scouring of Caldeum ♦ The Walls Shake ♦ Turning the Tide ♦ Essence of Hatred ♦ In Desolation's Wake ♦ Light Extinguished ♦ The Blind Eye ♦ What Lies Ahead
Evil Stirs in Kehjistan
Return to Tarsarak
After defeating Elias in the previous Act, Lilith is still nowhere in sight but her plans are clear now. Lorath proposes to meet at Tarsarak to prepare to face Lilith and stop her from entering Hell. Teleport to the waypoint in Tarsarak then head southwest to find the Parched Wanderer Inn. Neyrelle can be found sitting on a chair in the back room. She tells you that the other two, Lorath and Donan followed the Knights marching into Caldeum and confides in you about her worries and insecurities.
The Jewel of the East
Search for Lilith in Caldeum
In search for Lorath and Donan Neyrelle followed the Knights marching into Caldeum, Neyrelle joins you in your journey. Make your way west from Tarsarak by following the quest marker to your destination.
When you enter Caldeum Bazaar, your character will notice the blood rain. Speak with Donan after his short conversation with Lorath ends, then head west into the heart of Caldeum. When you approach the quest area, you'll encounter some Sin Eaters and Spawn of the Damned. Circle to the south side of the area, where your character will remark Inarius. A new, smaller quest area will appear to the west, so make your way there.
As you descend the stairs in the Residential District, you will be ambushed by some Mother's Chosen, Mother's Disciples, Mother's Heralds, Skittering Abominations, and Succubi. Defeat all the enemies in this small building, then continue following the path west. A few Fly Swarms, Pestilent Hosts, and Skittering Abominations will pop up on the way, but they shouldn't be too much of a problem. Right before you reach the quest area, you'll find a Heavy Gate. Interact with it to trigger a cutscene.
You'll walk into Inarius bolstering the morale of the Knights Penitent. After the knights leave, Lorath will challenge Inarius and question his plans. Inarius remains firm about his way of dealing with Lilith and takes the fragment of the Worldstone from Donan. Speak to Lorath afterward, who says that nothing has changed despite losing your main weapon. Head up the stairs, turn left, then head into the alley after opening up the Alley Gate.
Follow the path, and when you get to the open space, defeat the Hellion, Mother's Chosen, Wardens, and Elite Warden attacking Reverend Mother Prava. Speak to her, and she'll ask your group to provide support to Inarius in slaying Lilith.
The Walls Shake
Escort your party to Caldeum and fight Duriel
- Boss Fight: Duriel, Lord of Pain
Upon arriving at the Imperial Palace, your group tries the chain on the winch to open the gate but snaps, and now you have to find another way in. Turn back and two Elite Hellcaller Soul Burners, as well as some Sin Eaters and Soul Burners, will appear. Defeat or run past them and make your way west to get to the next quest area.
There, you'll encounter a few Mother's Chosen and Fly Swarms that you can simply run past. When you reach the bend, you'll encounter an Elite Chizorig Shadowtouch and several Skittering Abominations. Continue north past the bend and you'll find some more enemies - an Elite Fiery Pestilent Host, some Plague Maggots, and more Skittering Abominations. Continue north past some Plague Maggot Young to find an Elite Styhlez Boltcrawler. Don't forget to stock up on health potions at the Healing Well. Prepare yourself for a boss fight, then head into the quest area.
When you enter the circle, defeat as many Plague Maggot Young as you can. After a few seconds, Duriel, Lord of Pain will appear from the ground. He performs various frontal swipes with his front legs, with the more powerful swipes having more obvious telegraphs. In addition, he may wiggle for a bit, then release a powerful and putrid liquid from his stomach. Like most other bosses, staying behind him will help you mitigate a lot of damage.
Duriel may sometimes bury underground to reposition, making him invulnerable for a bit. While he buries back out, however, there is a short window of time where you can get some big hits in. Take him down, and the quest will be marked as completed.
Turning the Tide
Search for your allies in the Imperial Palace
After defeating Duriel, you were separated from your allies. Your main objective now is to locate your allies and find your way back into the Imperial Palace. To go to your next quest, head southeast following the marker. Neyrelle can be seen waiting by the steps, and she will lead the way back to Donan and the others.
There Imperial Library Waypoint can be unlocked here, and make sure to get it before you progress further. Once you talk to Donan, he will suggest going to the Cathedral of Hatred to find Lilith. Follow the path leading to your quest, and at the end, you will see a track of Lilith's Blood Petals. Interact with it to see a vision of Lilith entering the gates of hell. Share the vision that you just saw with your group and this will mark the quest as completed.
Essence of Hatred
Travel to the Burning Hells with your allies
You and your allies arrived at the Gates of Hell where you just saw a vision of Lilith entering it. To begin this quest you will enter the Burning Hells. Join your allies up ahead, and follow the path. For the first part of this quest, you'll simply be running towards your quest marker and bumping into groups of enemies The first group of enemies you'll encounter are some Vile Ones, Spawn of the Damned an Elite Soul Burner, and an Elite Vile Overseer. Defeat or run past them, and the next group of enemies you'll find will consist of Balrogs, Soul Burners, Vile Ones, Vile Shamans, and an Elite Balrog. Close by, you'll bump into a Balrog, some Vile Ones, Vile Overseers, and an Elite Vile Shaman.
You'll encounter more of the same enemies on your way to the quest marker. When you get to the Burning Overpass, your way forward will be blocked. While Neyrelle tries to dispel the flames in your way, you have to defend her from incoming demons. Vile Ones and Vile Overseers, as well as four Elite Vile Overseers, will drop down from above. During the last wave of mobs, an Elite Enemy called Rashibosh will join the fray. Just be aware of the special effects given to them, and you should be able to take them down.
Defeat all the enemies and Neyrelle will successfully put out the fire. Head into the Burning Overpass and you'll eventually find Reverend Mother Prava. Move her body and you'll find the Soulstone taken from you by Inarius. She'll start speaking weakly, so listen to what she says. Poisoned by hatred, she becomes aggressive when she learns that you took the soulstone entrusted to her, but Donan gives her a tonic that will get her back on her feet and she returns to Caldeum. The end of this event will mark this quest as completed.
In Desolation's Wake
Pursue Lilith and fight the bosses
- Boss Fight: Ninsa, Blight of Hatred, Karum, Hound of Hatred, and Ashava, the Pestilent.
Your group is still in pursuit of Lilith, and you managed to recover the soulstone from Reverend Mother Prava that was entrusted to her by Inarius. To begin this quest, speak to Donan and continue the path ahead, defeating any enemies that block your way. Enemies you'll encounter include Annihiliators, Balrogs, Sin Eaters, Soul Burners, Spawn of the Damned, Succubi, Vile Ones, Vile Overseers, and their Elite versions.
Donan will eventually warn you that an ambush is coming. While he and Lorath prepare a bulwark, climb up the cliff to their left to encounter Ninsa, Blight of Hatred. Though she has a boss health bar, taking her down to her health bar down to the first triangle will cause her to flee. At the start of the fight, defeat the four Soul Burners she's tethered to make her vulnerable, then deal a quarter of her health to end the fight for now. Vile Lunatics and Vile Shamans will come up the hill after she flees.
Continue forward around the bend to rejoin your allies. Neyrelle will dispel the first flame barrier with no issue, but at the next flame barrier, you'll have to protect Neyrelle from the boss Karum, Hound of Hatred.
After you've defeated Karum, head northeast and jump across the gap. Continue jumping across the gaps, defeating or ignoring the enemies in your way, and stock up on Health Potions at the Healing Well. Ahead, you'll have the opportunity to finish off Ninsa. When you get to the entrance of the next clearing, Nins, Blight of Hatred will swoop down from above with a quarter of her health missing. Whenever Donan says to take cover or to get inside the barrier, make sure you're standing in their purple bubble to avoid getting damaged by the falling AOE attacks.
Defeat Ninsa and all the demons with her to proceed. Follow Lorath to the center of the room and speak with him. Prepare for another boss fight as after the conversation ends, you will have to fight Ashava, the Pestilent.
After Ashava has been defeated, In Desolation's Wake will be marked as completed.
Light Extinguished
Use the Sightless Eye
You and your allies continue your way deeper into the Burning Hells. Speak to Lorath, then make your way into the Spire of Torment. There are no enemies in this first part of the quest, simply follow your allies until you reach Lilith's Blood Petals. Though Inarius' army initially sweeps through the demons with ease, a brief window of hesitation gives Lilith the opportunity to kill Inarius, and the rest of his army crumbles soon after.
Speak to Neyrelle about your vision, then follow Lorath once more. Once he has prepared the Sightless Eye, interact with it. While Neyrelle and Lorath argue about the danger of using the Eye, Donan gets stabbed by a corpse hanging on a pillar. After the cutscene ends, three Malformed Pillars will fall from above. All three pillars must be destroyed. As you damage one, however, Disfigured Corpses and an Elite Disfigured Corpse will start appearing. Take care of each pillar one by one to avoid getting overwhelmed.
Check up on Donan after you've dealt with them. He'll agree with Donan about using the Eye, then the quest will end.
The Blind Eye
Inspect Lilith's Altar and survive the attack
- Boss Fight: Genbar, the Shrine-Keeper, Brol, the Tyrant King, Elias, Fallen Horadrim, Airidah, Keeper of the Dead, and Astaroth.
Donan who is still injured from the previous fight is preparing the Sightless Eye for you to track Lilith down. Interact with it to witness Lilith being granted safe passage into the Cathedral of Hatred. Noticing you use the eye, Lilith traps you in a nightmare. Follow the path west, listening to Lilith as you go.
When you reach the chapel, speak to the priest. Demons with the names of the Nevesk villagers will appear after he's done talking. Defeat them, then head further into the nightmare. Just ahead, you'll have to fight some Knights Penitent. They have attacks that can blind you, so any status effect cleanses will be useful here. Continue north, passing by a memory of Donan mourning Yorin, and Vigo's last moments.
You will eventually find Rathma's Corpse. Interact with it and Lilith will give you some insights about the prophecy and the Eternal Conflict. When you reach a memory of Elias, she will mention that she had no intention of leading mankind to salvation herself and that that responsibility falls to you. Reach Lilith's Altar, and she will offer you a chance to join her once more. Your character will refuse, after which Lilith will send Nightmares and Hellbinders after you.
After about a minute of defending yourself, Mephisto will offer you a portal out. Take it, and follow the path to the end to find and interact with a campfire. Mephisto will grant you a blessing that will aid you in leaving the nightmare. The next section will be a long, continuous fight, so prepare yourself, then jump across the gap.
To escape the nightmare, you are going to have to fight your way past a few bosses you have encountered in the main campaign before. They have the same move sets as before, so if you're having trouble with any of them, check out their individual boss pages. Run forward and you'll encounter a few Nightmares. Further ahead are Genbar, the Shrine-Keeper, and Brol, the Tyrant King. The next bosses you will encounter up the path are Elias, Fallen Horadrim, and Airidah, Keeper of the Dead. Finally, at the end will be Astaroth.
After you've defeated all five bosses, interact with the Sightless Eye. You will be awoken from the nightmare and the quest will end.
What Lies Ahead
Fight Lilith
- Boss Fight: Lilith
- Rewards: Adventurer's Tunic of the Crowded Sage


After fighting multiple bosses that Lilith sent after to slow you down, Mephisto will aid you in escaping the nightmare Lilith trapped you in. Speak with Neyrelle once you reunite with your allies. Unfortunately, the wound Donan received is fatal and he won't survive long. Neyrelle runs off while Lorath keeps him company in his final moments. After the conversation ends, head southeast to find Neyrelle. When you speak to her, Mephisto will appear, offering safe passage to the Cathedral of Hatred. Neyrelle is wary of him, but with no other way there, you are forced into this uneasy alliance.
Enter the portal and head north towards the throne. Before you head up the stairs, make sure to stock up on Health Potions at the Healing Well. Up the stairs, speak to Neyrelle. After some conversation, she decides to use the Soulstone on Mephisto instead of Lilith. Though you have a way back to your friends and Sanctuary, your character fears that with the soulstone, Lilith will continue hunting your group down. Neyrelle returns to find Lorath while you stay behind to deal with Lilith once and for all.
Lilith has two boss phases, one as Lilith, Creator of Sanctuary, and the second as Lilith, Daughter of Hatred. To reach her second phase, you need to completely deplete her health bar. To learn more about her boss fight and how to deal with her attacks, visit her boss page.
Once Lilith's health is depleted, she falls on her knees and you will watch her turn into dust as she speaks her final words. Return to Lorath by taking the portal. When you reach him, Neyrelle is nowhere to be seen. After the conversation ends, you will be teleported back to Hawezar and the final quest of Act VI will conclude.
Diablo 4 All Epilogue Main Quests Quick Navigation
Promises
Search with your allies
After successfully defeating Lilith and Neyrelle disappearing with the soulstone holding Mephisto, the Sanctuary is still in unrest. You will head northwest into the chapel to look for Neyrelle. She's not here, but Lorath agrees that she might already be at the Vault.
Head outside and you'll encounter Iosef and a group of Knight Penitents. They turn aggressive, wanting to take Lorath away. Defeat them and when you pick up Prava's Decree, you learn that Reverend Mother Prava believes that your group released a great evil into Sanctuary. When you speak to Lorath, he says that you should head to the vault to find Neyrelle before the Knights Penitent does and that he would catch up after burying Donan in Scosglen.
A Heavy Burden
Discover Neyrelle's letter
After discovering that Reverend Mother Prava has sent the Knights Penitent out to find your allies, you will make your way to the Vault to find Neyrelle. Teleport to the Yelesna Waypoint, then head northeast to get to the Horadric Vault and find Neyrelle before the knights do. You search the Vault for Neyrelle everywhere but she's still nowhere to be seen.
Pick up the Runed Letter from the table and the quest will end.
Legacy of the Horadrim
Speak with Lorath
After discovering a letter that may have come from Neyrelle, teleport to the Firebreak Manor in Scosglen to discuss its contents with Lorath. When you speak to him, the final cutscene narrated by Neyrelle begins. It appears that Neyrelle has gone on a journey on her own and she chose to find a way to deal with the future threat of demons without risking anyone's life. In the end, Neyrelle mentions that her journey will involve "facing him and his brothers", referring to Mephisto, Diablo, and Baal, the 3 Prime Evils. The fate of Neyrelle and Mephisto sealed in a soulstone remains unknown. The end of this quest marks the end of the main campaign.

 Anonymous
Whats up with the bat flying out of the drawer in the chapel?

 Anonymous

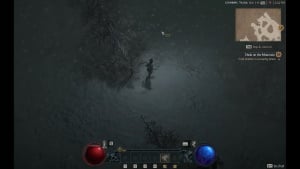
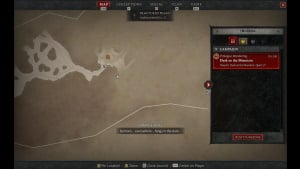
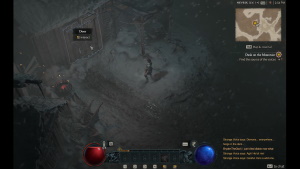
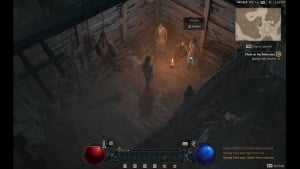
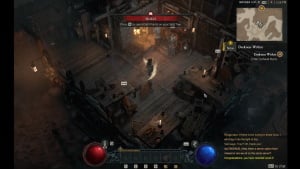
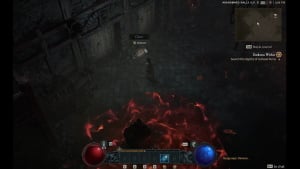
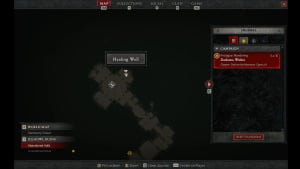
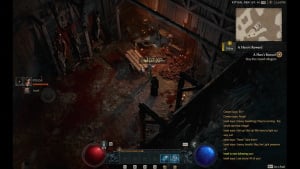
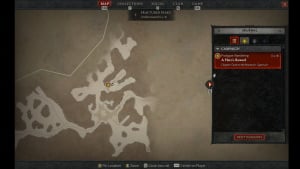
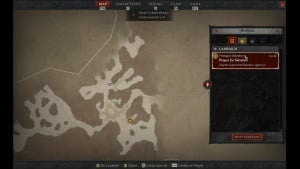
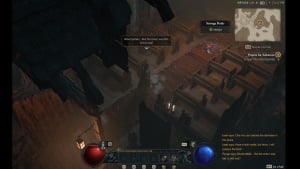
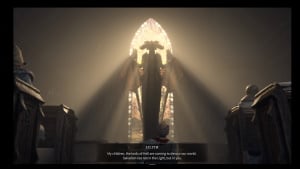
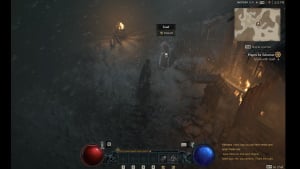
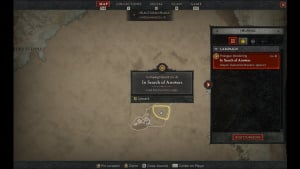
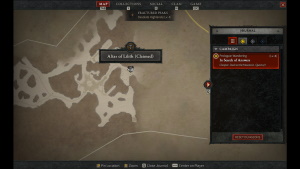
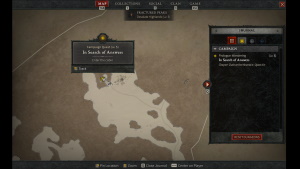
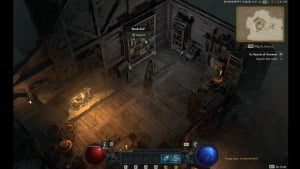
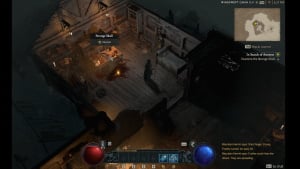
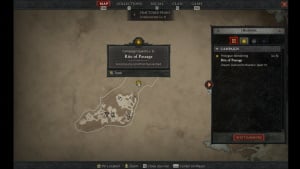
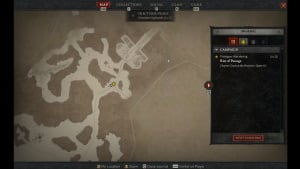
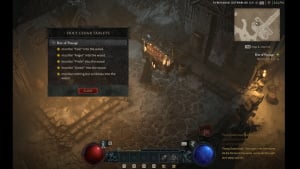
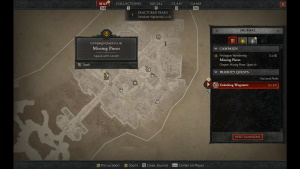
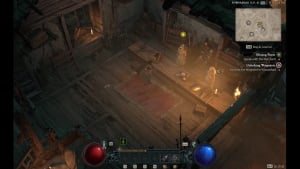
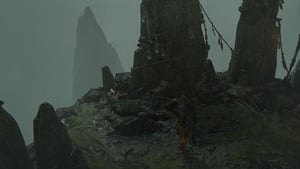
Sheesh, while I really appreciate the effort in writing this, the prose is ABYSMAL. What was the ChatGPT prompt in writing this walkthrough - "embellish as much as possible"? I really appreciate the walkthrough, but the ridiculous exaggeration is REALLY distracting. I'd rather plumb through a more user-unfriendly site like IGN than sit through paragraphs of over-the-top tripe like "captivating cutscene" and "sense of pride and accomplishment". Please, Fextra, give us the old D:OS 2-style prose again!
1
+13
-1