Wandering Death, Death Given Life |
|
|---|---|
 |
|
| Location | The Crucible |
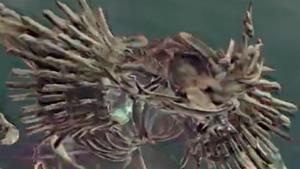
Wandering Death, Death Given Life is a Boss in Diablo 4. Wandering Death, Death Given Life is located at The Crucible.Wandering Death, Death Given Life is a giant skeleton-like World Boss. Players have 15 minutes to defeat Wandering Death. Bosses are special Enemies that can be defeated to complete Quests, progress through the game, and to acquire special Equipment. However, there are Bosses not-related to the main quests and can be found as a side activity or even roaming the world.
Diablo 4 Wandering Death, Death Given Life Location & Information
World Bosses like Wandering Death, Death Given Life, will start to appear on the map when you finish the campaign. The world boss marker on your map will show which boss it is, a counter to show when the world boss will appear, and the duration of the legendary rewards players can get by defeating the world boss in that period of time. Players are advised to defeat the World Bosses whenever they come up as it is an easy way to get guaranteed Legendary items. Players can take on the World Bosses alone or with their group of friends or other players that are fighting the same world boss.
- Location: Sarran Caldera in the Dry Steppes, or the Fields of Desecration in Hawezar (depending on your progress in the game)
- Quests: There are no related Quests
- This is an optional Boss
Wandering Death, Death Given Life Rewards in Diablo 4
- Once players defeat Wandering Death, Death Given Life, players will receive various rewards, including the weekly bonus rewards, Scattered Prisms, Legendary gear as well as a loot box that contains additional gear, gold, and gems.
Diablo 4 Wandering Death, Death Given Life Strategies
Video Strategies
[Video Example]
Diablo 4 Wandering Death, Death Given Life Strategy Writeup
Wandering Death is a massive skeletaal monster. It deals massive AoE damage and many of its attacks are AoE-centered.
Try to read the telegraphed signals to be able to escape the areas in which iut will attack.
As its health gets lower, it will start to get significatively more aggressive. Casting faster and more often. Also many of its attacks will become an improved version of the ones casted at the beginning of the fight.
Attacks & Counters
| Attack | Counter |
| Phase 1 |
|
| Charged AoE: It creates a circular area circled by rotten bones that concentrates energy in the middle and eventually explodes. | Avoid the marked area to dodge the attack. If you are caught inside, break a bone wall to escape. |
| Ground claws: It uses his hands to create a corruption area in front of him and calls it back as a slashing attack. | Move away from the corrupted area |
| Corrupted Beams: Wandering Death fires two thick beams to either side, while moving and turning. | Don't lose sight of it to keep evading the beams. This is a slow attack. |
| 4 arms slam: It slams the ground with its four arms. Two on its front side and two to its back side. | watch the marked area to avoid the attack. |
| 4-Way Corruption: It stretches its four arms and creates a bigger version of the ground claws, creating 4 corrupted area. | Try to stay in front of Wandering Death |
| Three Beams: After you remove 50% of its health, it will create a 3-beam version of Corrupted Beams. Moving and turning as it is channeling the beams. | Don't lose sight of it, and keep evading the beam. |
Diablo 4 Wandering Death, Death Given Life Lore
- Lore notes, information on folklore, etc go here
- Lore theories should be clearly marked as such.
Diablo 4 Wandering Death, Death Given Life Notes & Trivia
- Voice Actor, homages, and other trivia go here.
Diablo 4 Wandering Death, Death Given Life Image Gallery
[images go here]
